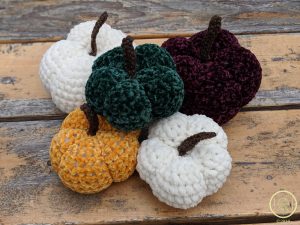
August is the month that stands between summer and fall, my absolute favorite season. With the kids back in school (seriously, already!?) and the stores filling the aisles with fall and Halloween decorations, I can’t help but have it on my mind earlier and earlier each passing year. Did I also mention anywhere on this blog about my obsession with velvet yarn? Seriously, I can’t stop buying it! It’s so soft and luxurious! I decided to do something more with it than just hoard it though, and since fall was on my mind I couldn’t help but think that a velvet crocheted pumpkin would be the perfect pattern to create and take my mind off of this hot *not fall* weather and replace it with reminders that fall is on its way. Sooooooon.
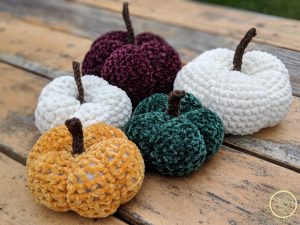
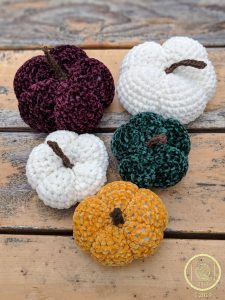
These little pumpkins are just the right size to fit in your hands and make the perfect quick gift for any fellow lover of autumn. I have included two sizes in my pattern.
Larger mini pumpkins measure roughly 6 inches across and 3 inches in height.
Mini pumpkins measure at roughly 4 inches across and just over 2 inches in height.
Sizing largely depends on the brand of velvet yarn that you use. The brand that I used (Lion Brand Vel-Luxe) is considered a medium weight yarn. Any brand of velvet/chenille yarn will work up great though!
Materials
Lion Brand Vel-Luxe yarn (or any other velvet yarn) and Lion Brand Fishermen’s Wool yarn (or any other wool yarn)
4.00mm crochet hook
Polyfil stuffing
Embroidery needle

Larger Velvet Mini Pumpkin
Use velvet yarn and 4.00mm crochet hook
6sc in a magic circle
Round 1: inc in each st around (12)
Round 2: *inc in 1st st; sc in next st*; repeat around (18)
Round 3:*inc in 1st st; sc in next 2 sts*; repeat around (24)
Round 4:*inc in 1st st; sc in next 3 sts*; repeat around (30)
Round 5:*inc in 1st st; sc in next 4 sts*; repeat around (36)
Round 6:*inc in 1st st; sc in next 5 sts*; repeat around (42)
Round 7:*inc in 1st st; sc in next 6 sts*; repeat around (48)
Rounds 8-13:sc in each st around (48)
Round 14:*dec2tog, sc in next 6 sts*; repeat around (42)
Round 15:*dec2tog, sc in next 5 sts*; repeat around (36)
Round 16:*dec2tog, sc in next 4 sts*; repeat around (30)
Round 17:dec2tog, sc in next 3 sts*; repeat around (24)
Round 18: dec2tog, sc in next 2 sts*; repeat around (18)
Round 19:dec2tog, sc in next st*; repeat around (12)
Round 20:dec around until piece closes. Fasten off leaving an extra long tail for creating the pumpkin ribs
Stem
Use brown wool yarn and 4.00mm crochet hook
Ch 16. Starting from 2nd ch from hook sl st all the way back for a total of 15 sl sts. You will now work your way around the opposite side and place another 15 sl sts all the way down. Fasten off leaving a long tail for sewing.
***Set stem aside for now and scroll down to the pumpkin ribbing instructions***
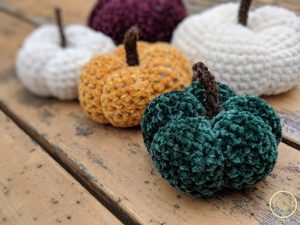
Smaller Velvet Mini Pumpkin
Use velvet yarn and 4.00mm crochet hook
6sc in a magic circle
Round 1: inc in each st around (12)
Round 2: *inc in 1st st; sc in next st*; repeat around (18)
Round 3:*inc in 1st st; sc in next 2 sts*; repeat around (24)
Round 4:*inc in 1st st; sc in next 3 sts*; repeat around (30)
Round 5:*inc in 1st st; sc in next 4 sts*; repeat around (36)
Rounds 6-10:sc in each st around (36)
Round 11:*dec2tog, sc in next 4 sts*; repeat around (30)
Round 12:dec2tog, sc in next 3 sts*; repeat around (24)
Round 13: dec2tog, sc in next 2 sts*; repeat around (18)
Round 14:dec2tog, sc in next st*; repeat around (12)
Round 15:dec around until piece closes. Fasten off leaving an extra long tail for creating the pumpkin ribs
Stem
Use brown wool yarn and 4.00mm crochet hook
Ch 12. Starting from 2nd ch from hook sl st all the way back for a total of 11 sl sts. You will now work your way around the opposite side and place another 11 sl sts all the way down. Fasten off leaving a long tail for sewing.
***Set stem aside for now and scroll down to the pumpkin ribbing instructions***
Pumpkin Rib Instructions
Now you will take the pumpkin piece and begin to create the ribs using the long yarn tail at the bottom of piece. You create the ribs by taking the yarn tail upward towards the top with your embroidery needle and feeding it down into the pumpkin to the bottom where your long tail started. Pull through tightly to squeeze each rib into shape. ***Take care in pulling your yarn tail as velvet yarn can be a bit delicate to work with.
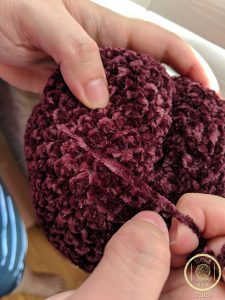
Continue to work your way around your pumpkin repeating the above step. You should be able to create about 5 or 6 ribs total to give it a pumpkin appearance. Fasten off and weave in all ends.
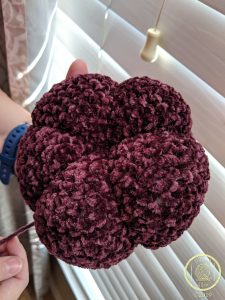
At this point you can sew your stems to the top off your pumpkin. Weave in the ends.
Now all that is left is to enjoy your new decorative fall piece! These pumpkins look great on mantels or among any other fall decor. You can customize these with vines or lovely ribbons if you so choose. The possibilities are endless!
All designs & pictures are copyrighted by To Craft A Home 2019. Pattern is for personal use only and can’t be resold, republished, or redistributed in any way. You may sell the finished project if you so desire, but please give credit and link to my website or my Etsy
Find more of my patterns on Ravelry
https://www.tocraftahome.com
