

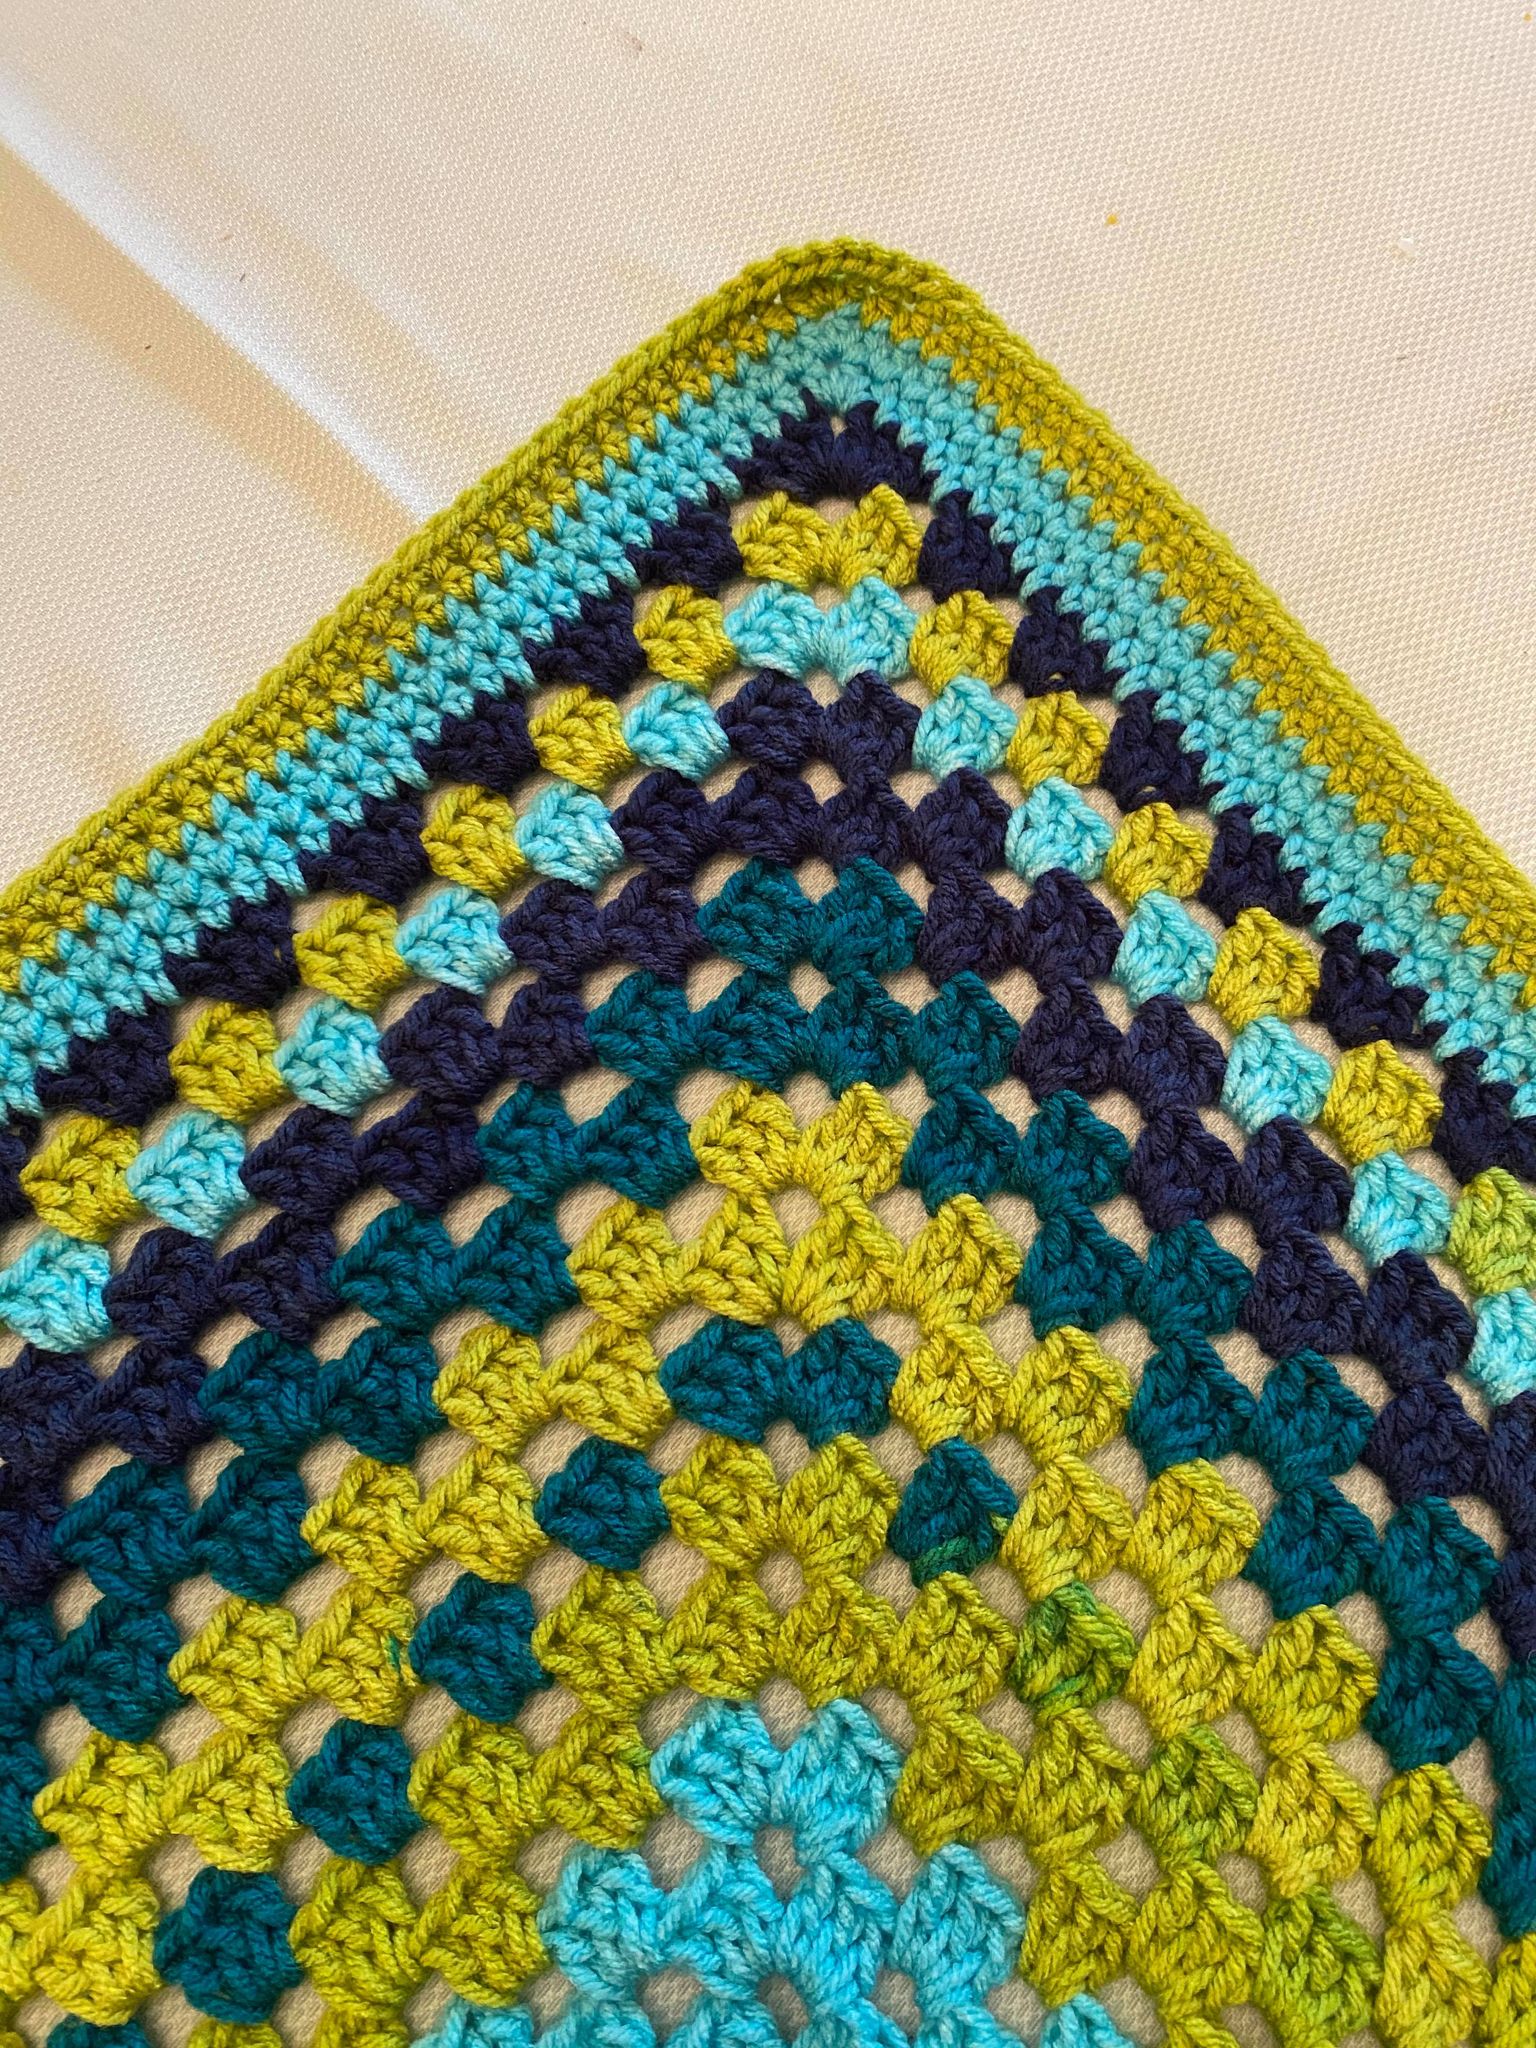
When it comes to blankets and afghans, I’m never a big fan. I lose interest quickly and prefer smaller projects that work up fast. However, I’ve found that self-striping yarn and just the right stitch or pattern can help push that boredom aside. The classic granny stitch is a great way to work something up and it’s been around forever. We’ve all grown up seeing this blanket. A taste of nostalgia mixed with endless comfort. Not only is this stitch as simple as can be, but also it looks very appealing to the eye! It’s truly one of those stitches where all you have to do is grab your project, hook, and skein, and park yourself down to watch a movie or settle in with friends for a nice cup of tea. This blanket practically works itself up!
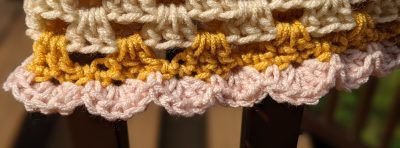
With my oldest daughter, a blanket using this granny stitch was gifted to her at birth and we soon discovered it was her absolute favorite blanket as she grew. Cozy enough to keep her warm, but not too thick to overheat her. Just right! With our newest addition, I just knew I had to make up another one for her to also enjoy. I opted to make two different borders because there’s so much you can do to dress up this finished blanket! My best friend happens to be two weeks behind me in her own pregnancy, so of course I had to make her son a blanket as well. With this pattern I will include both borders, one being a more basic border, the other (as pictured above) with more of a shell stitch feminine border.
Materials:
- 5.5mm crochet hook
- Worsted weight self striping yarn in any color (I used 3 skeins of Yarn Bee Sugarwheel at 355 yards each (a finished baby blanket will be about 2.5 skeins worth, estimated 900 yards worth)
- Embroidery needle
Row 1: Ch 32. In 4th ch from hook place 2dc (your skipped first 3 ch sts will act as your 3rd dc in this instance).
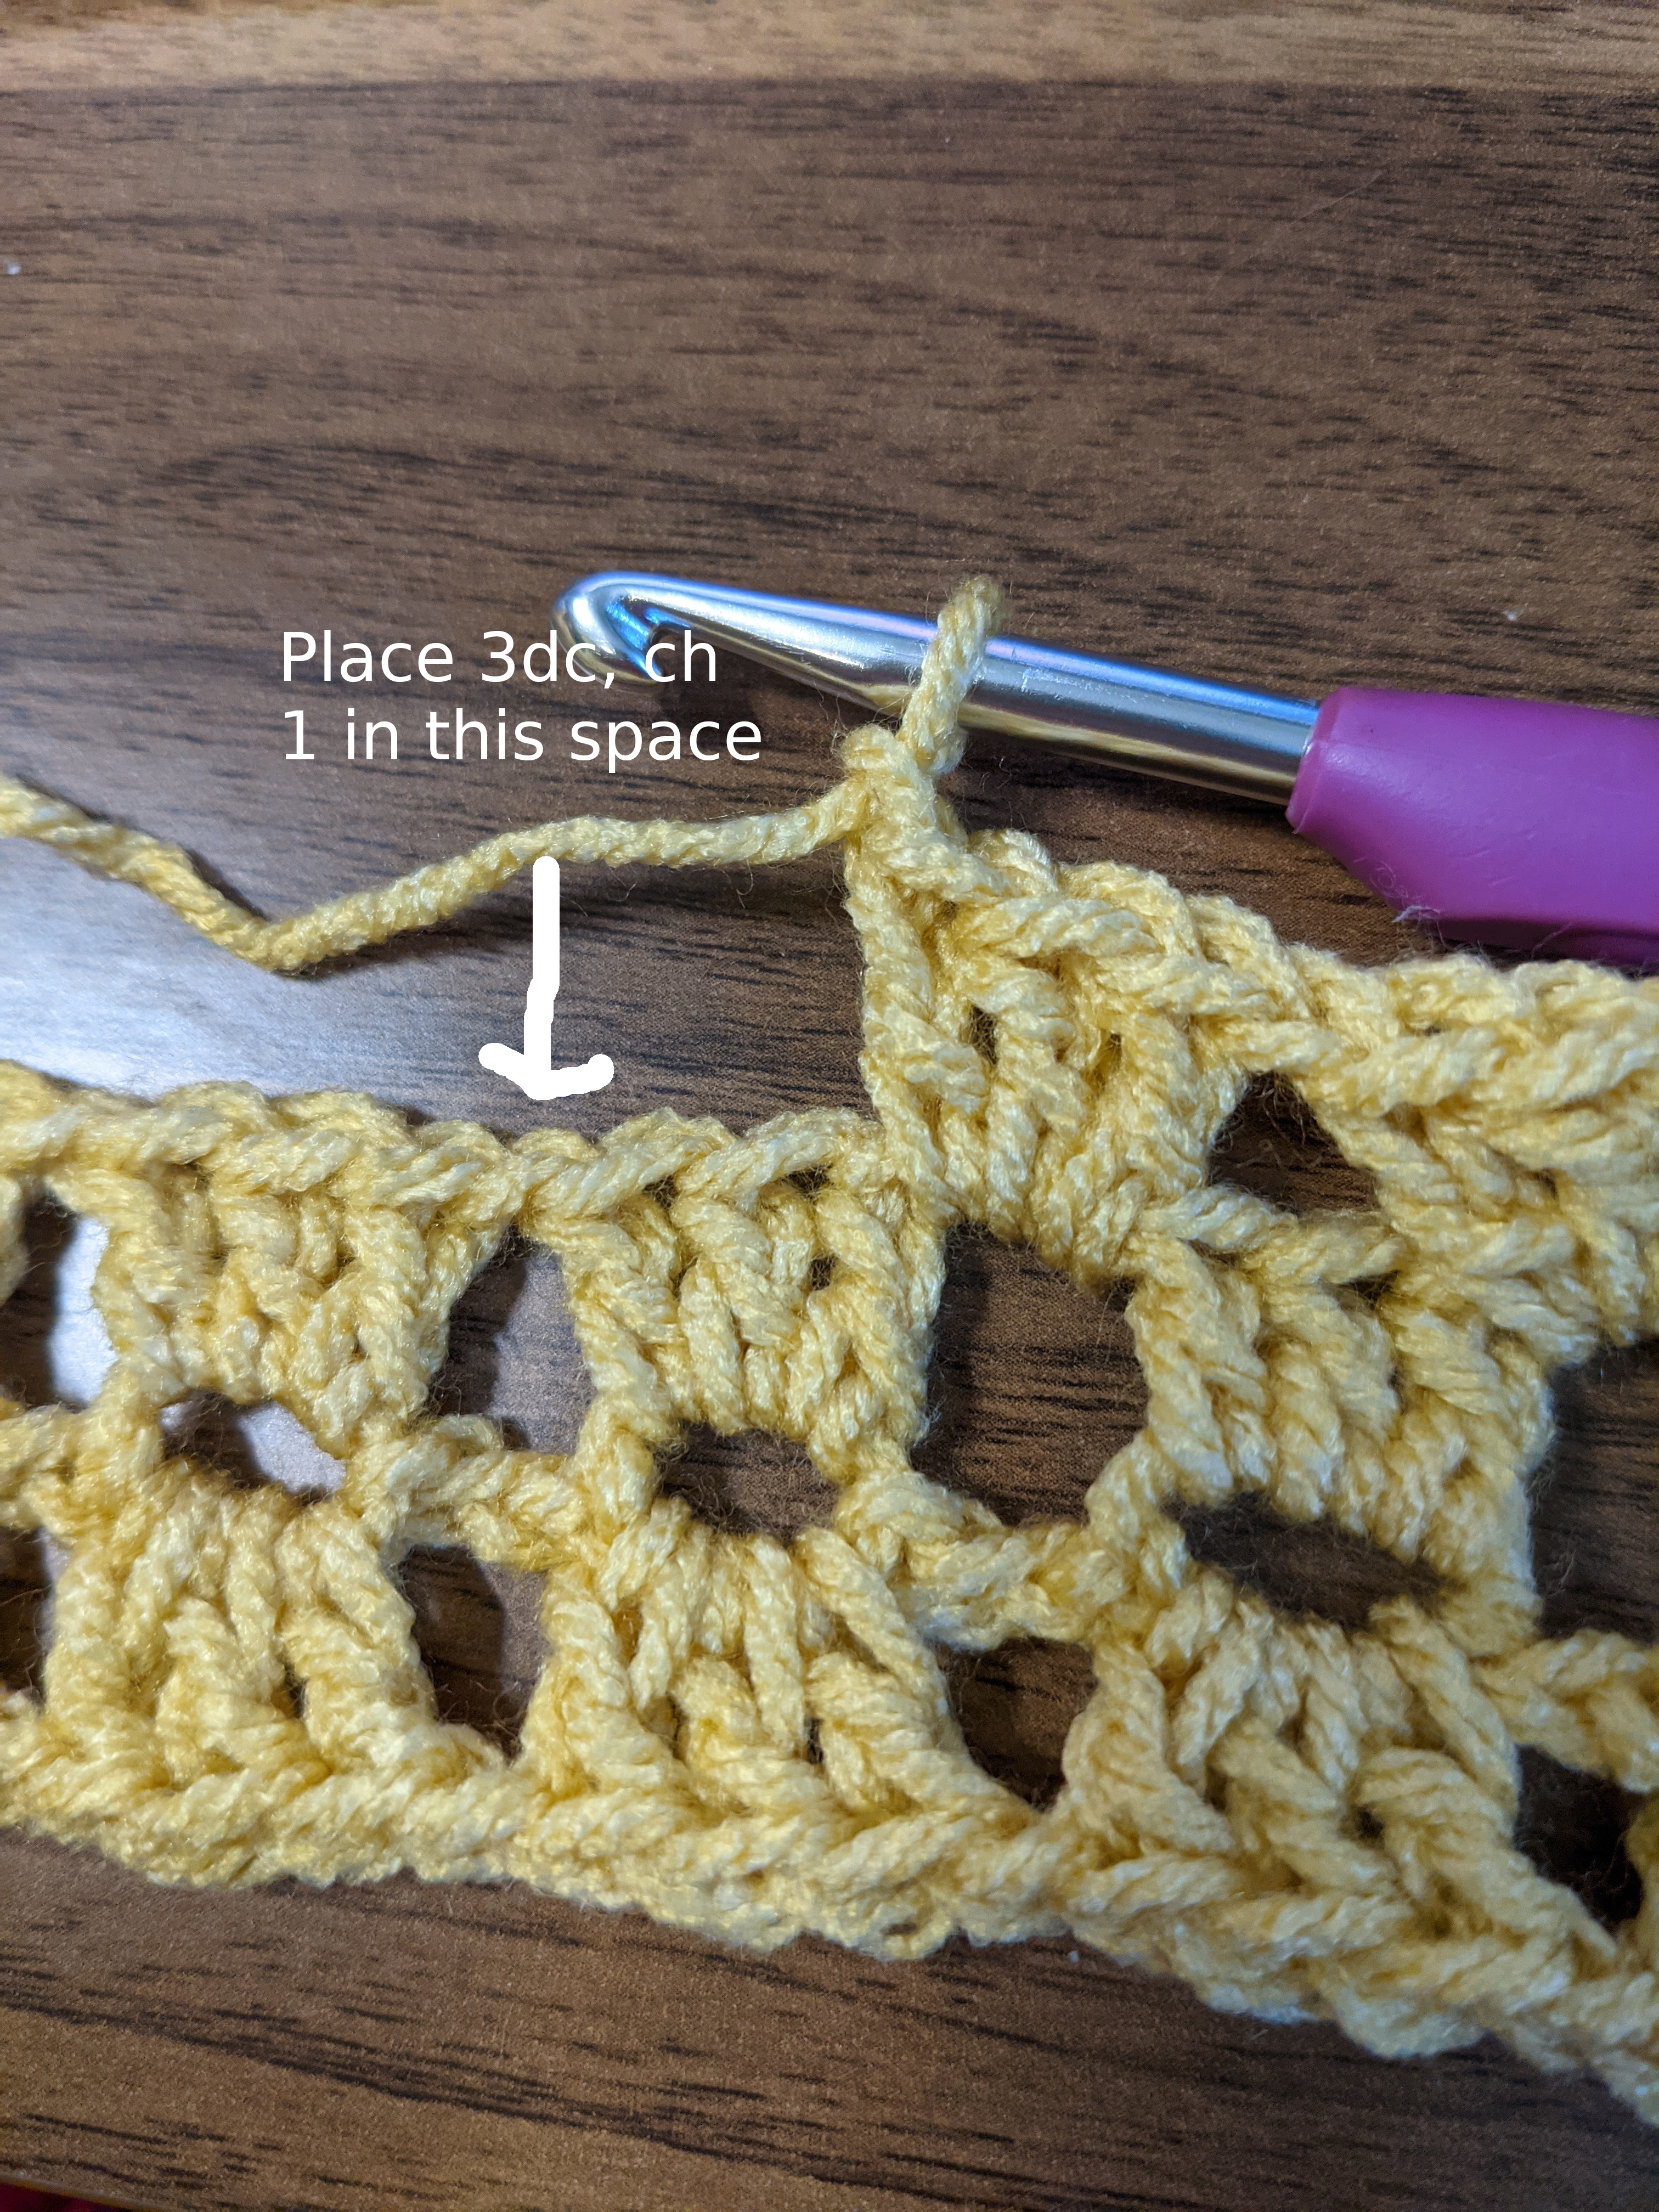
Ch 1. Skip next 3 ch sts. In following ch space (4th ch space) you will place 3dc followed by a ch 1.
Work your way down until the end of the ch skipping every 3 ch sps and placing 3dc in each 4th space followed by a ch 1.
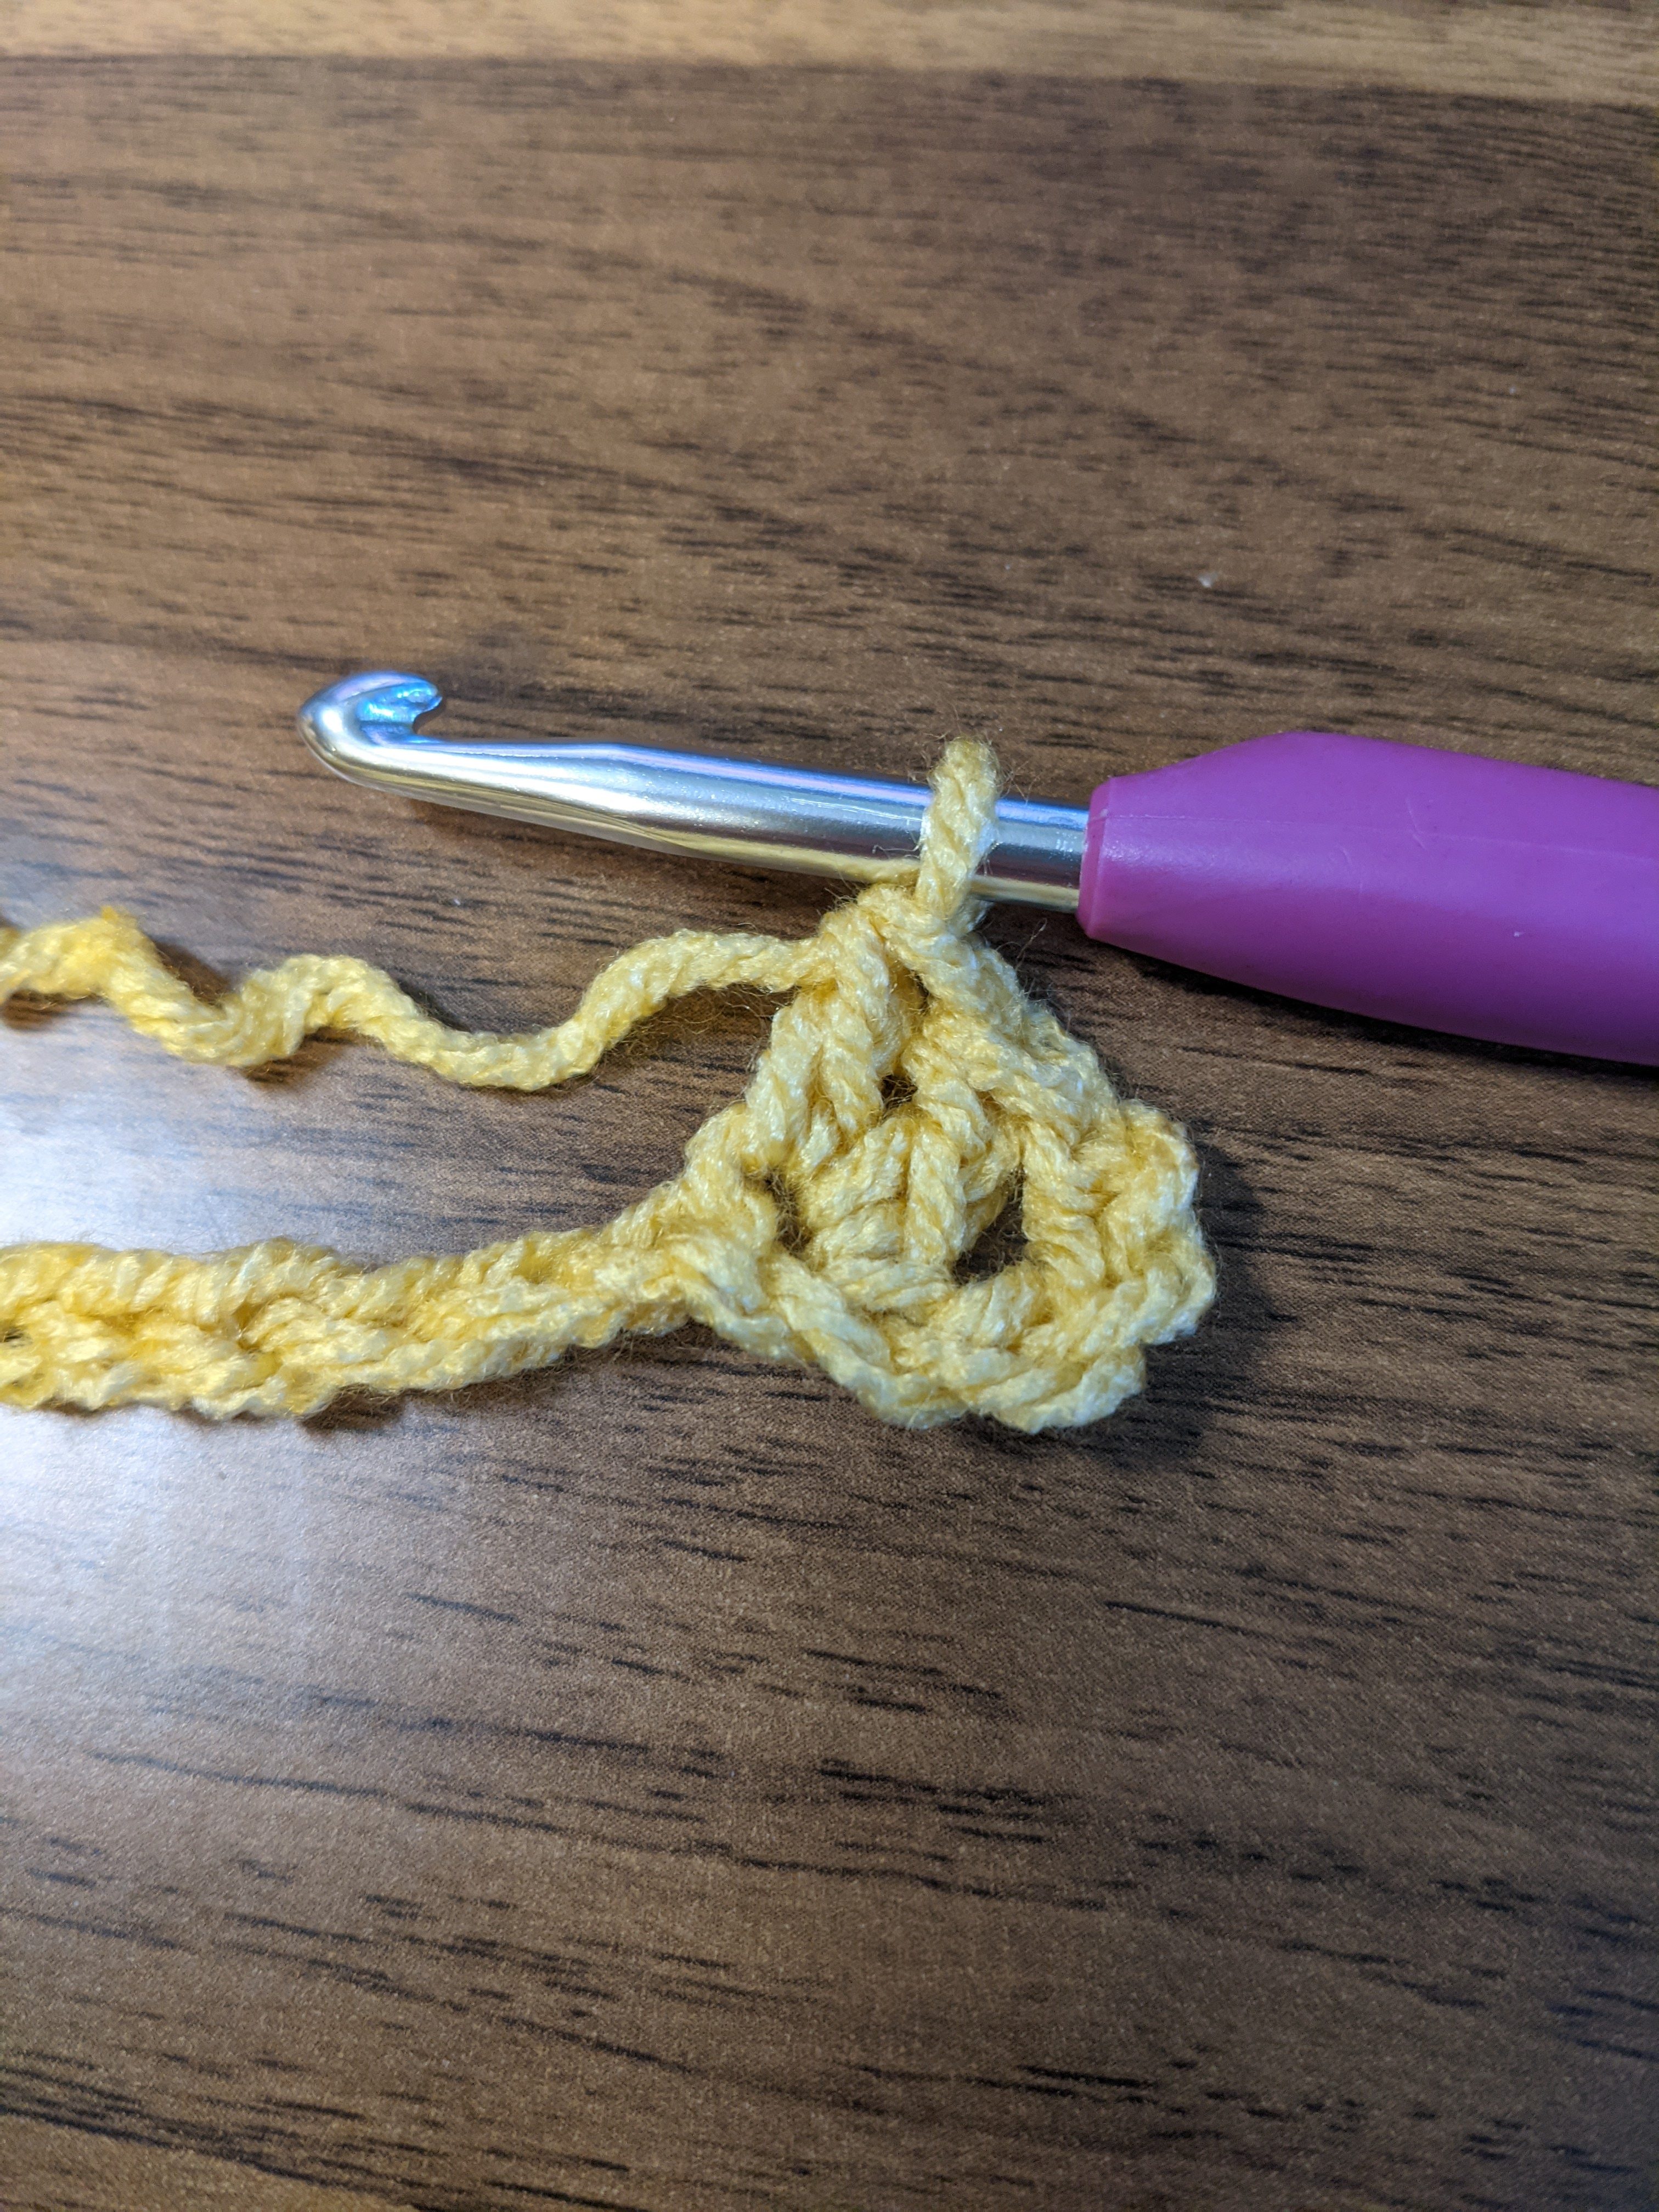
Once you get to the last ch 4 space at the end of your ch, you will begin work on the corner. First work your normal 3dc into the space. Then instead of ch 1, you will ch 3 since it is a corner space.
You will begin to turn your piece while working and in the same end ch space place another 3dc followed by another ch 3.
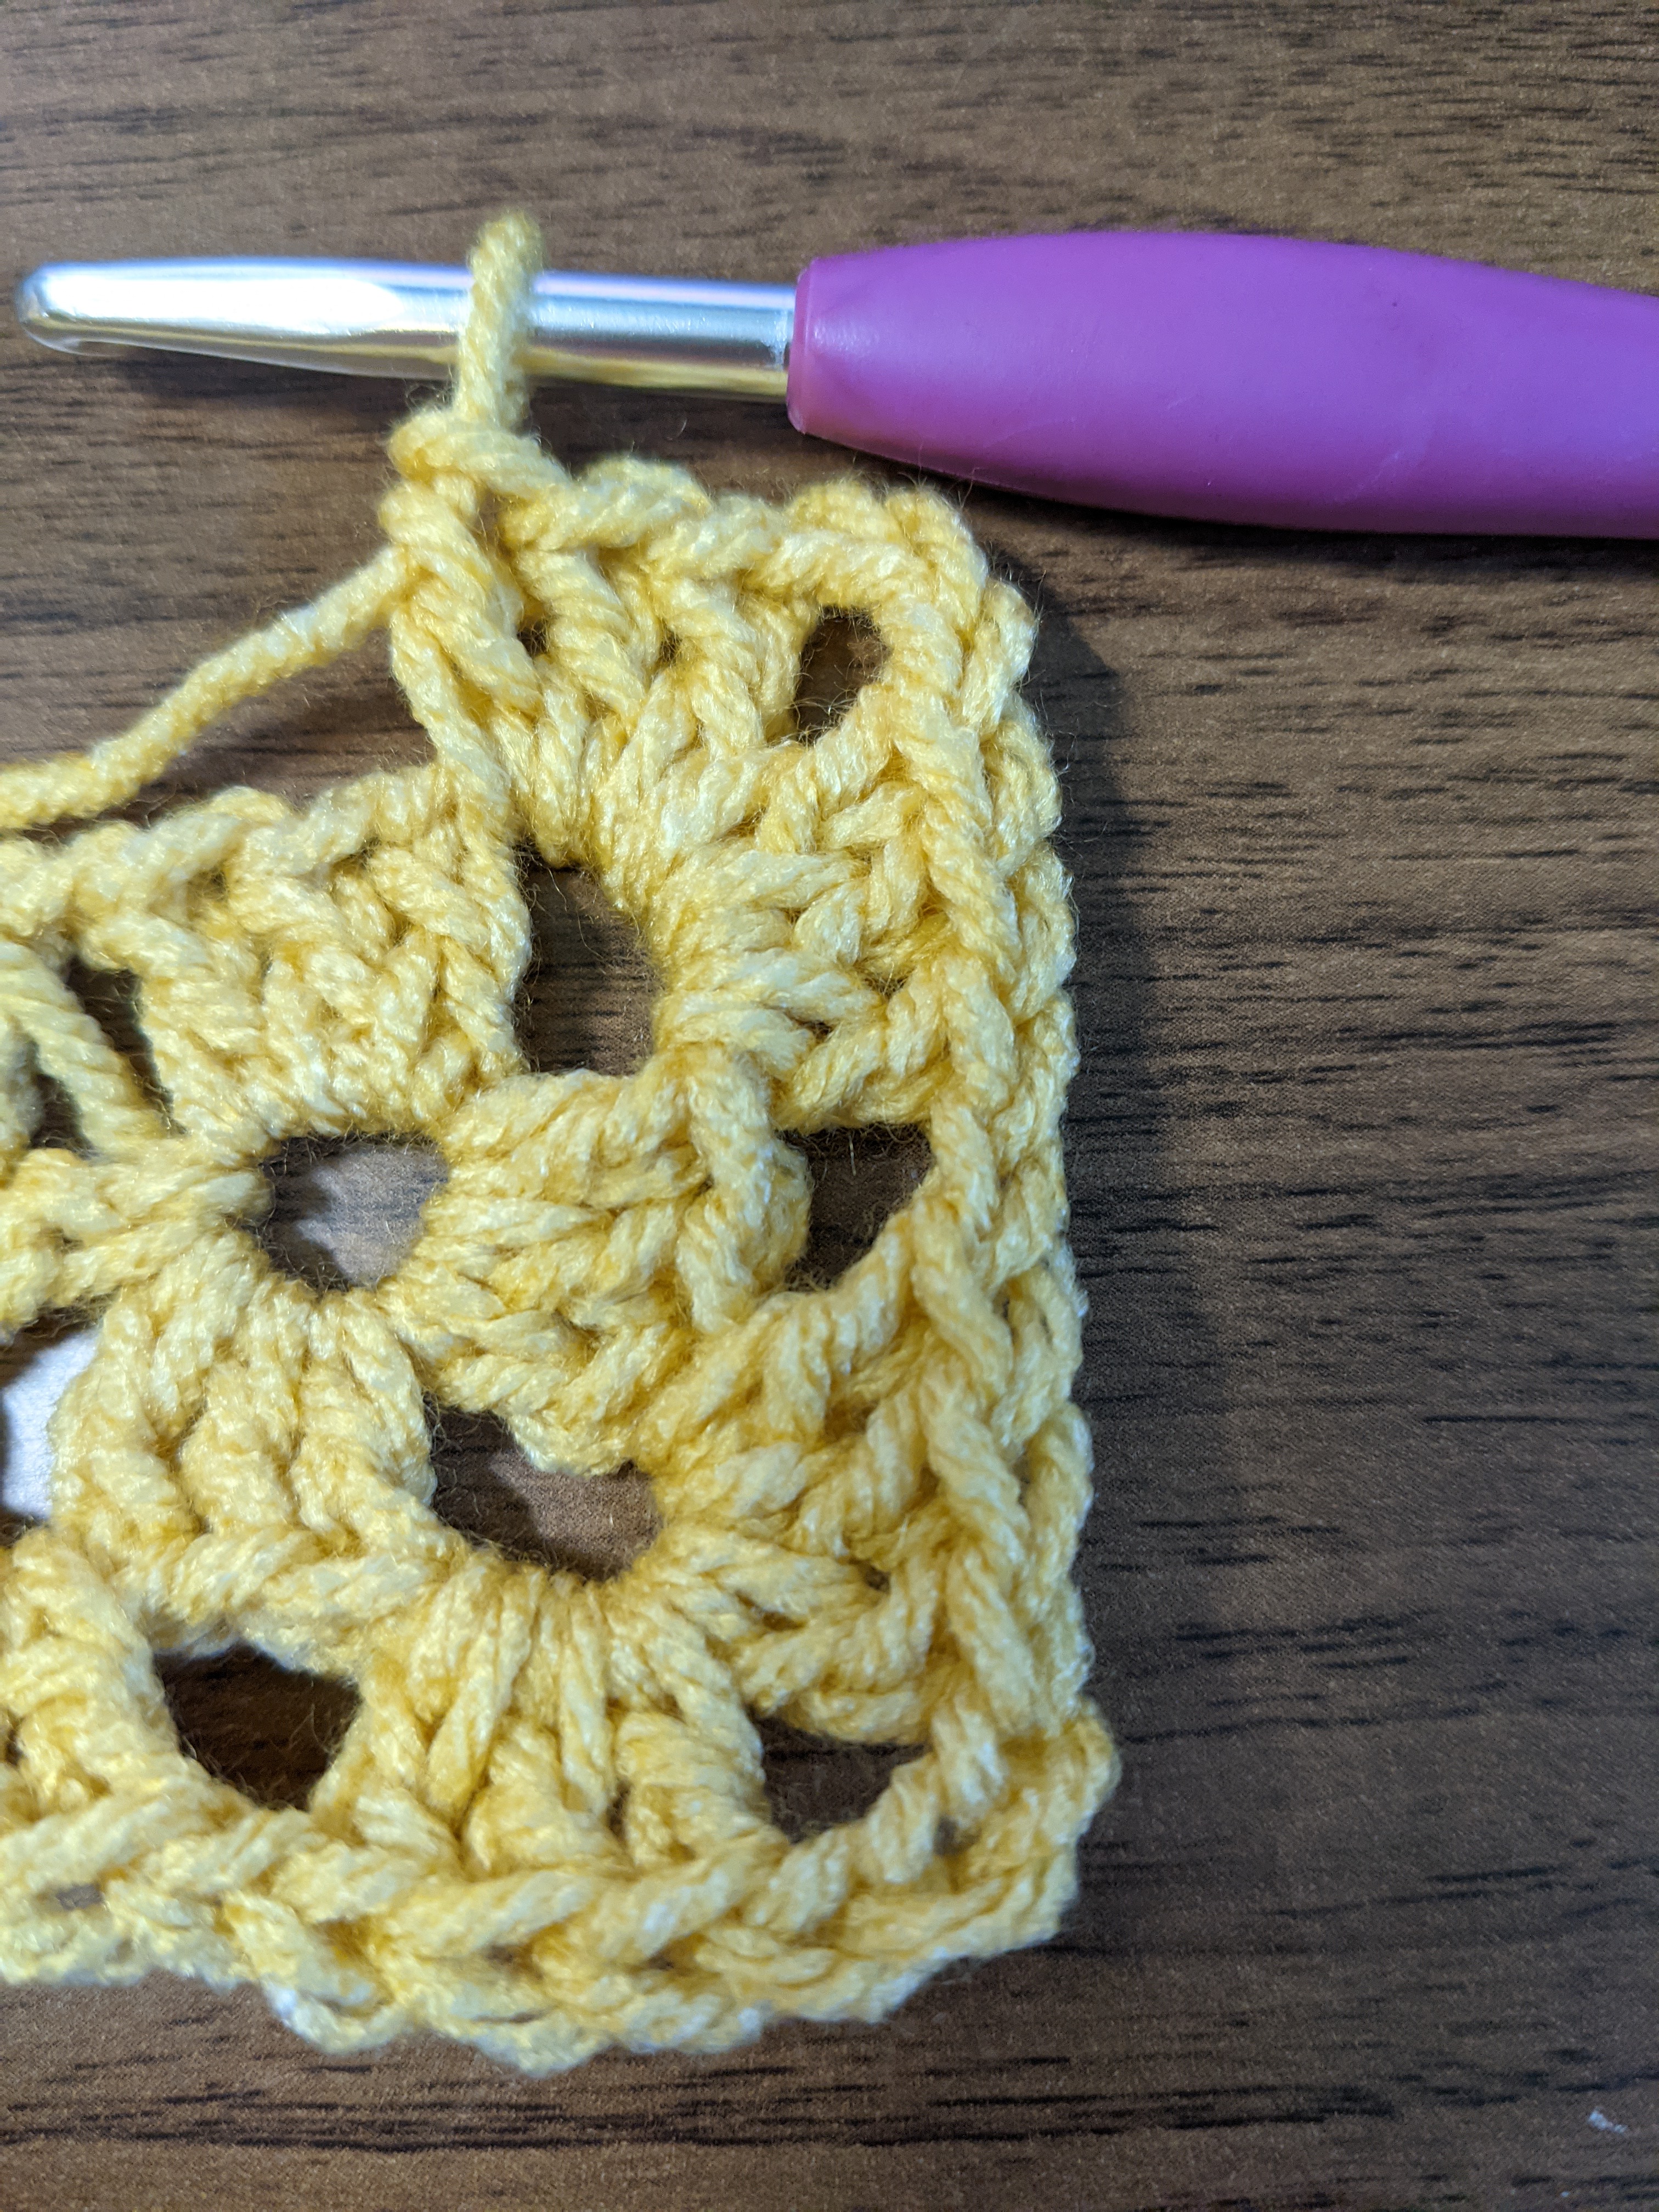
Now to finish off the corner you will place one more additional 3dc into that same ch space and this will bring you to the opposite side. From here you will ch 1 and begin to work your *3dc, ch 1* into each hole space opposite of the other side’s 3dc clusters. It will begin to look as follows:
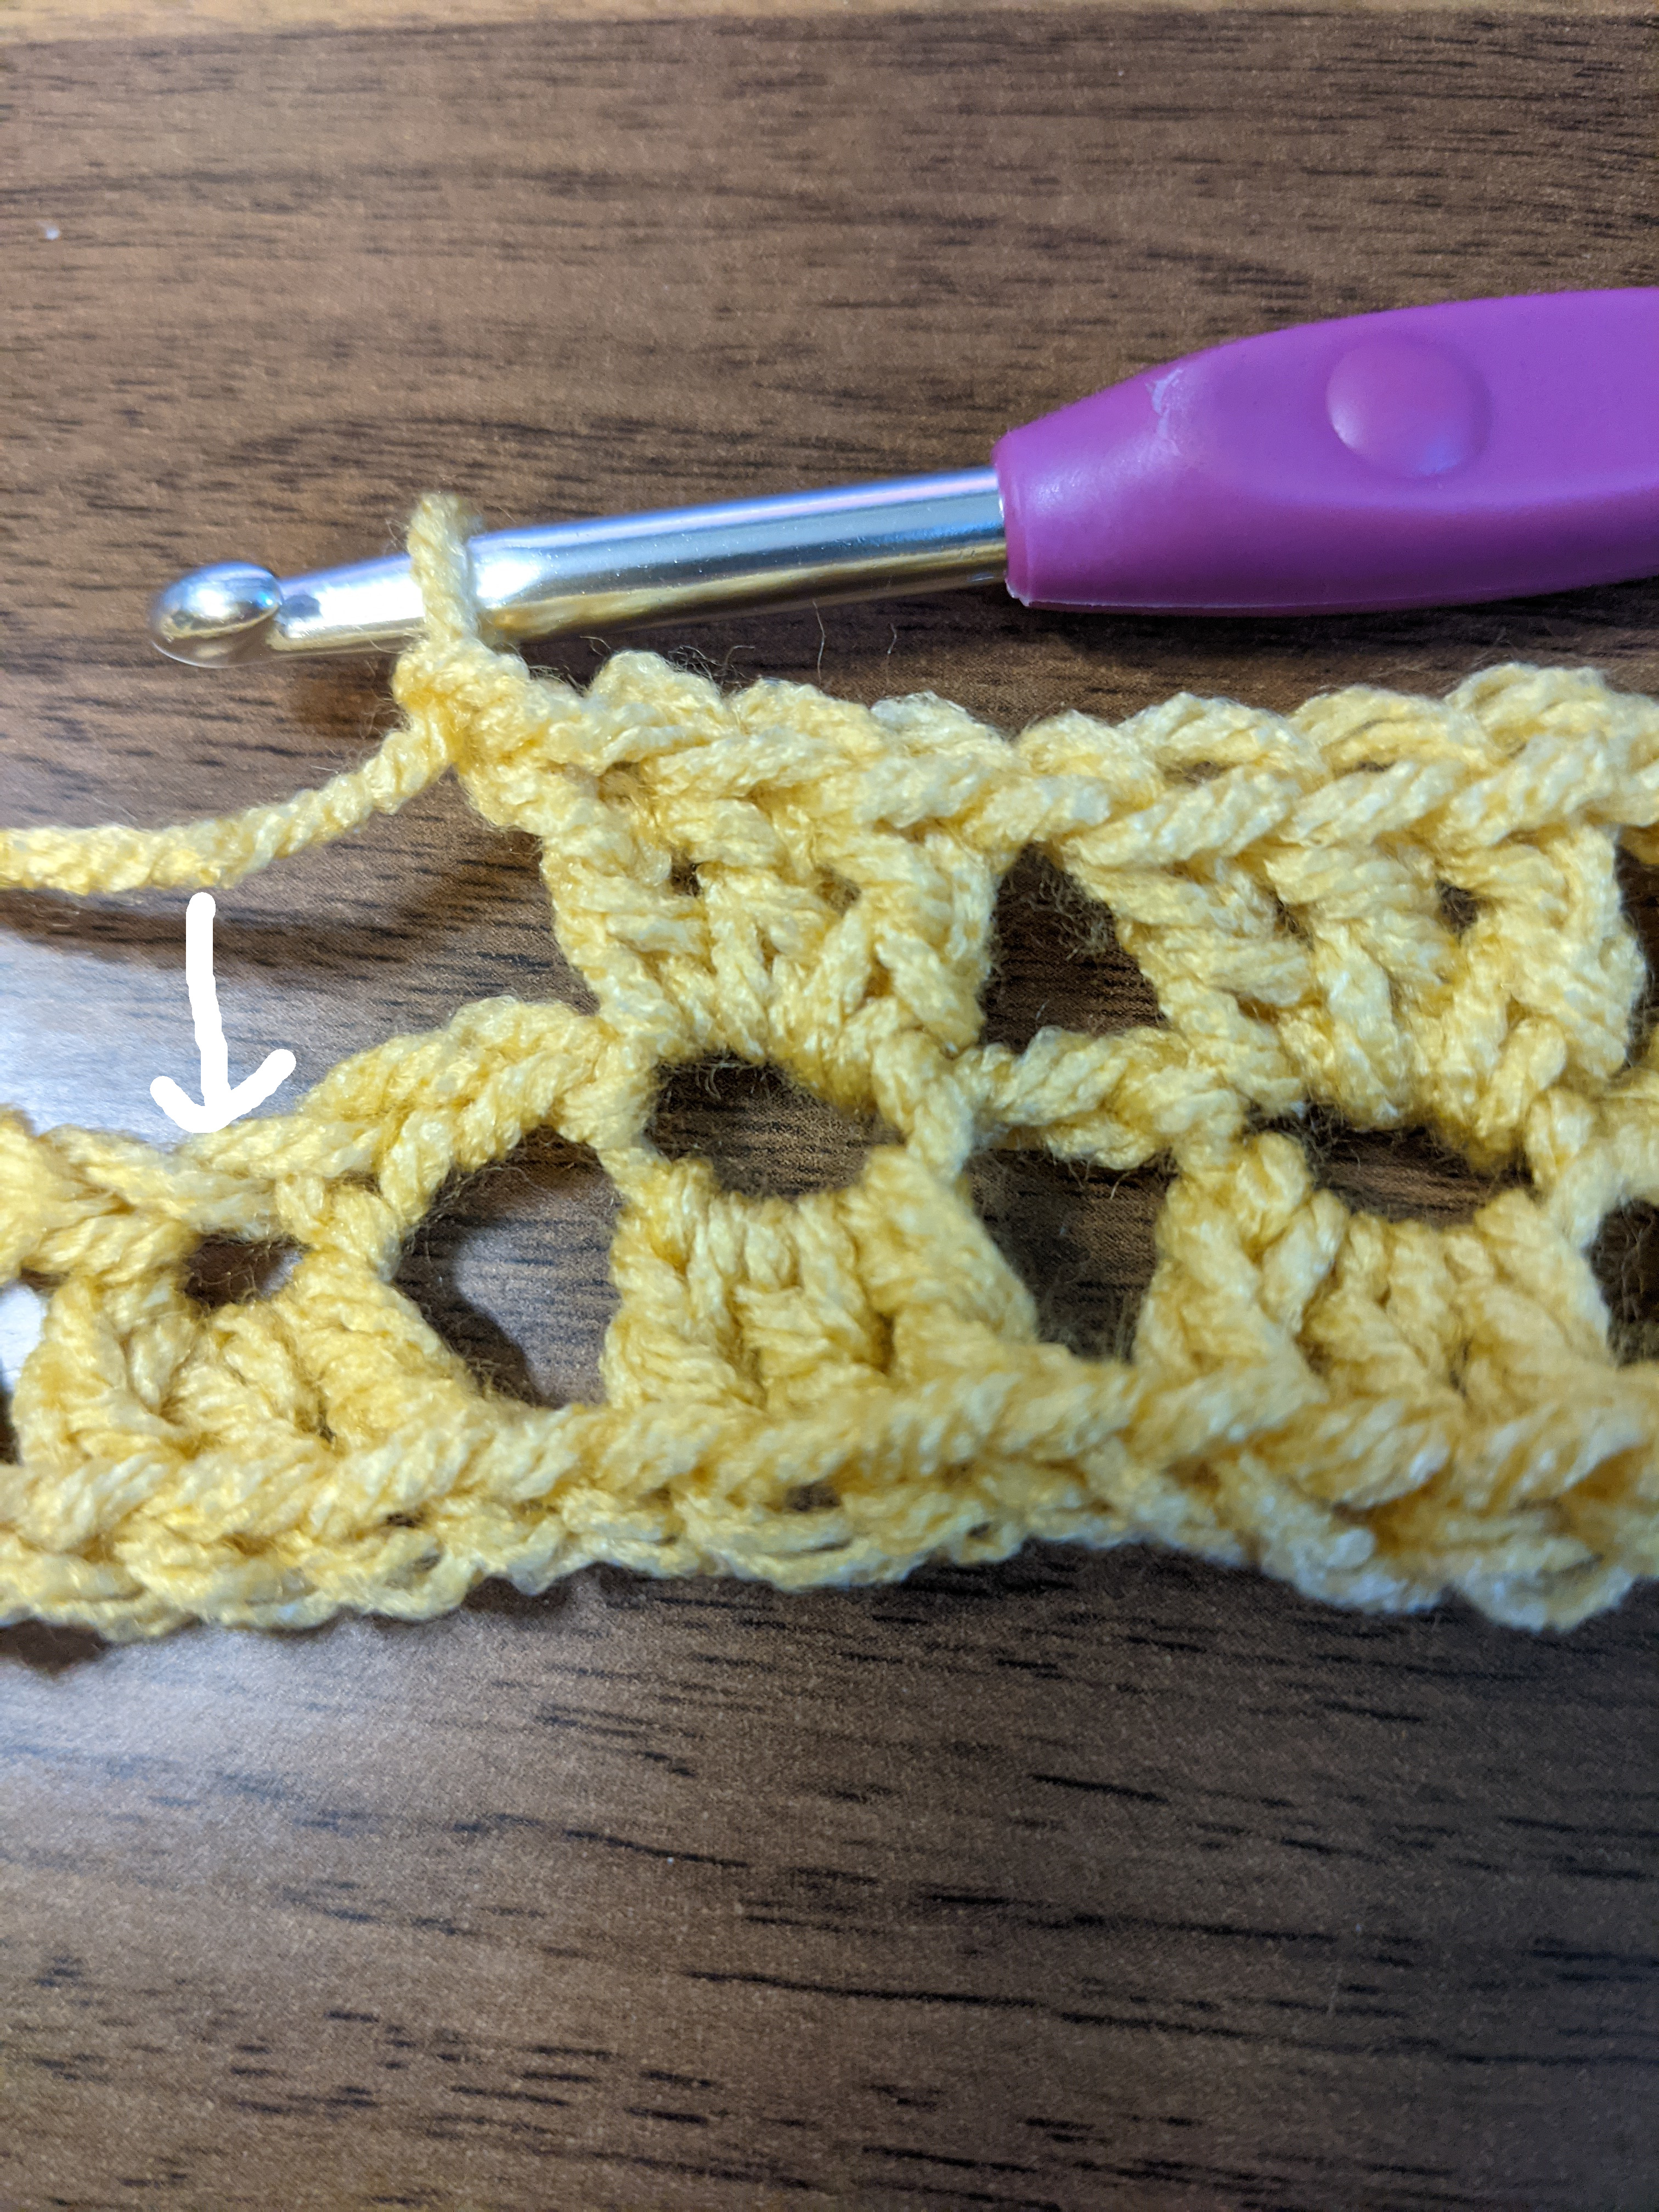
Once you reach the final space on this side you will want to begin your final corner. Place your 3dc into the space followed by a ch 3. You will turn your piece again.
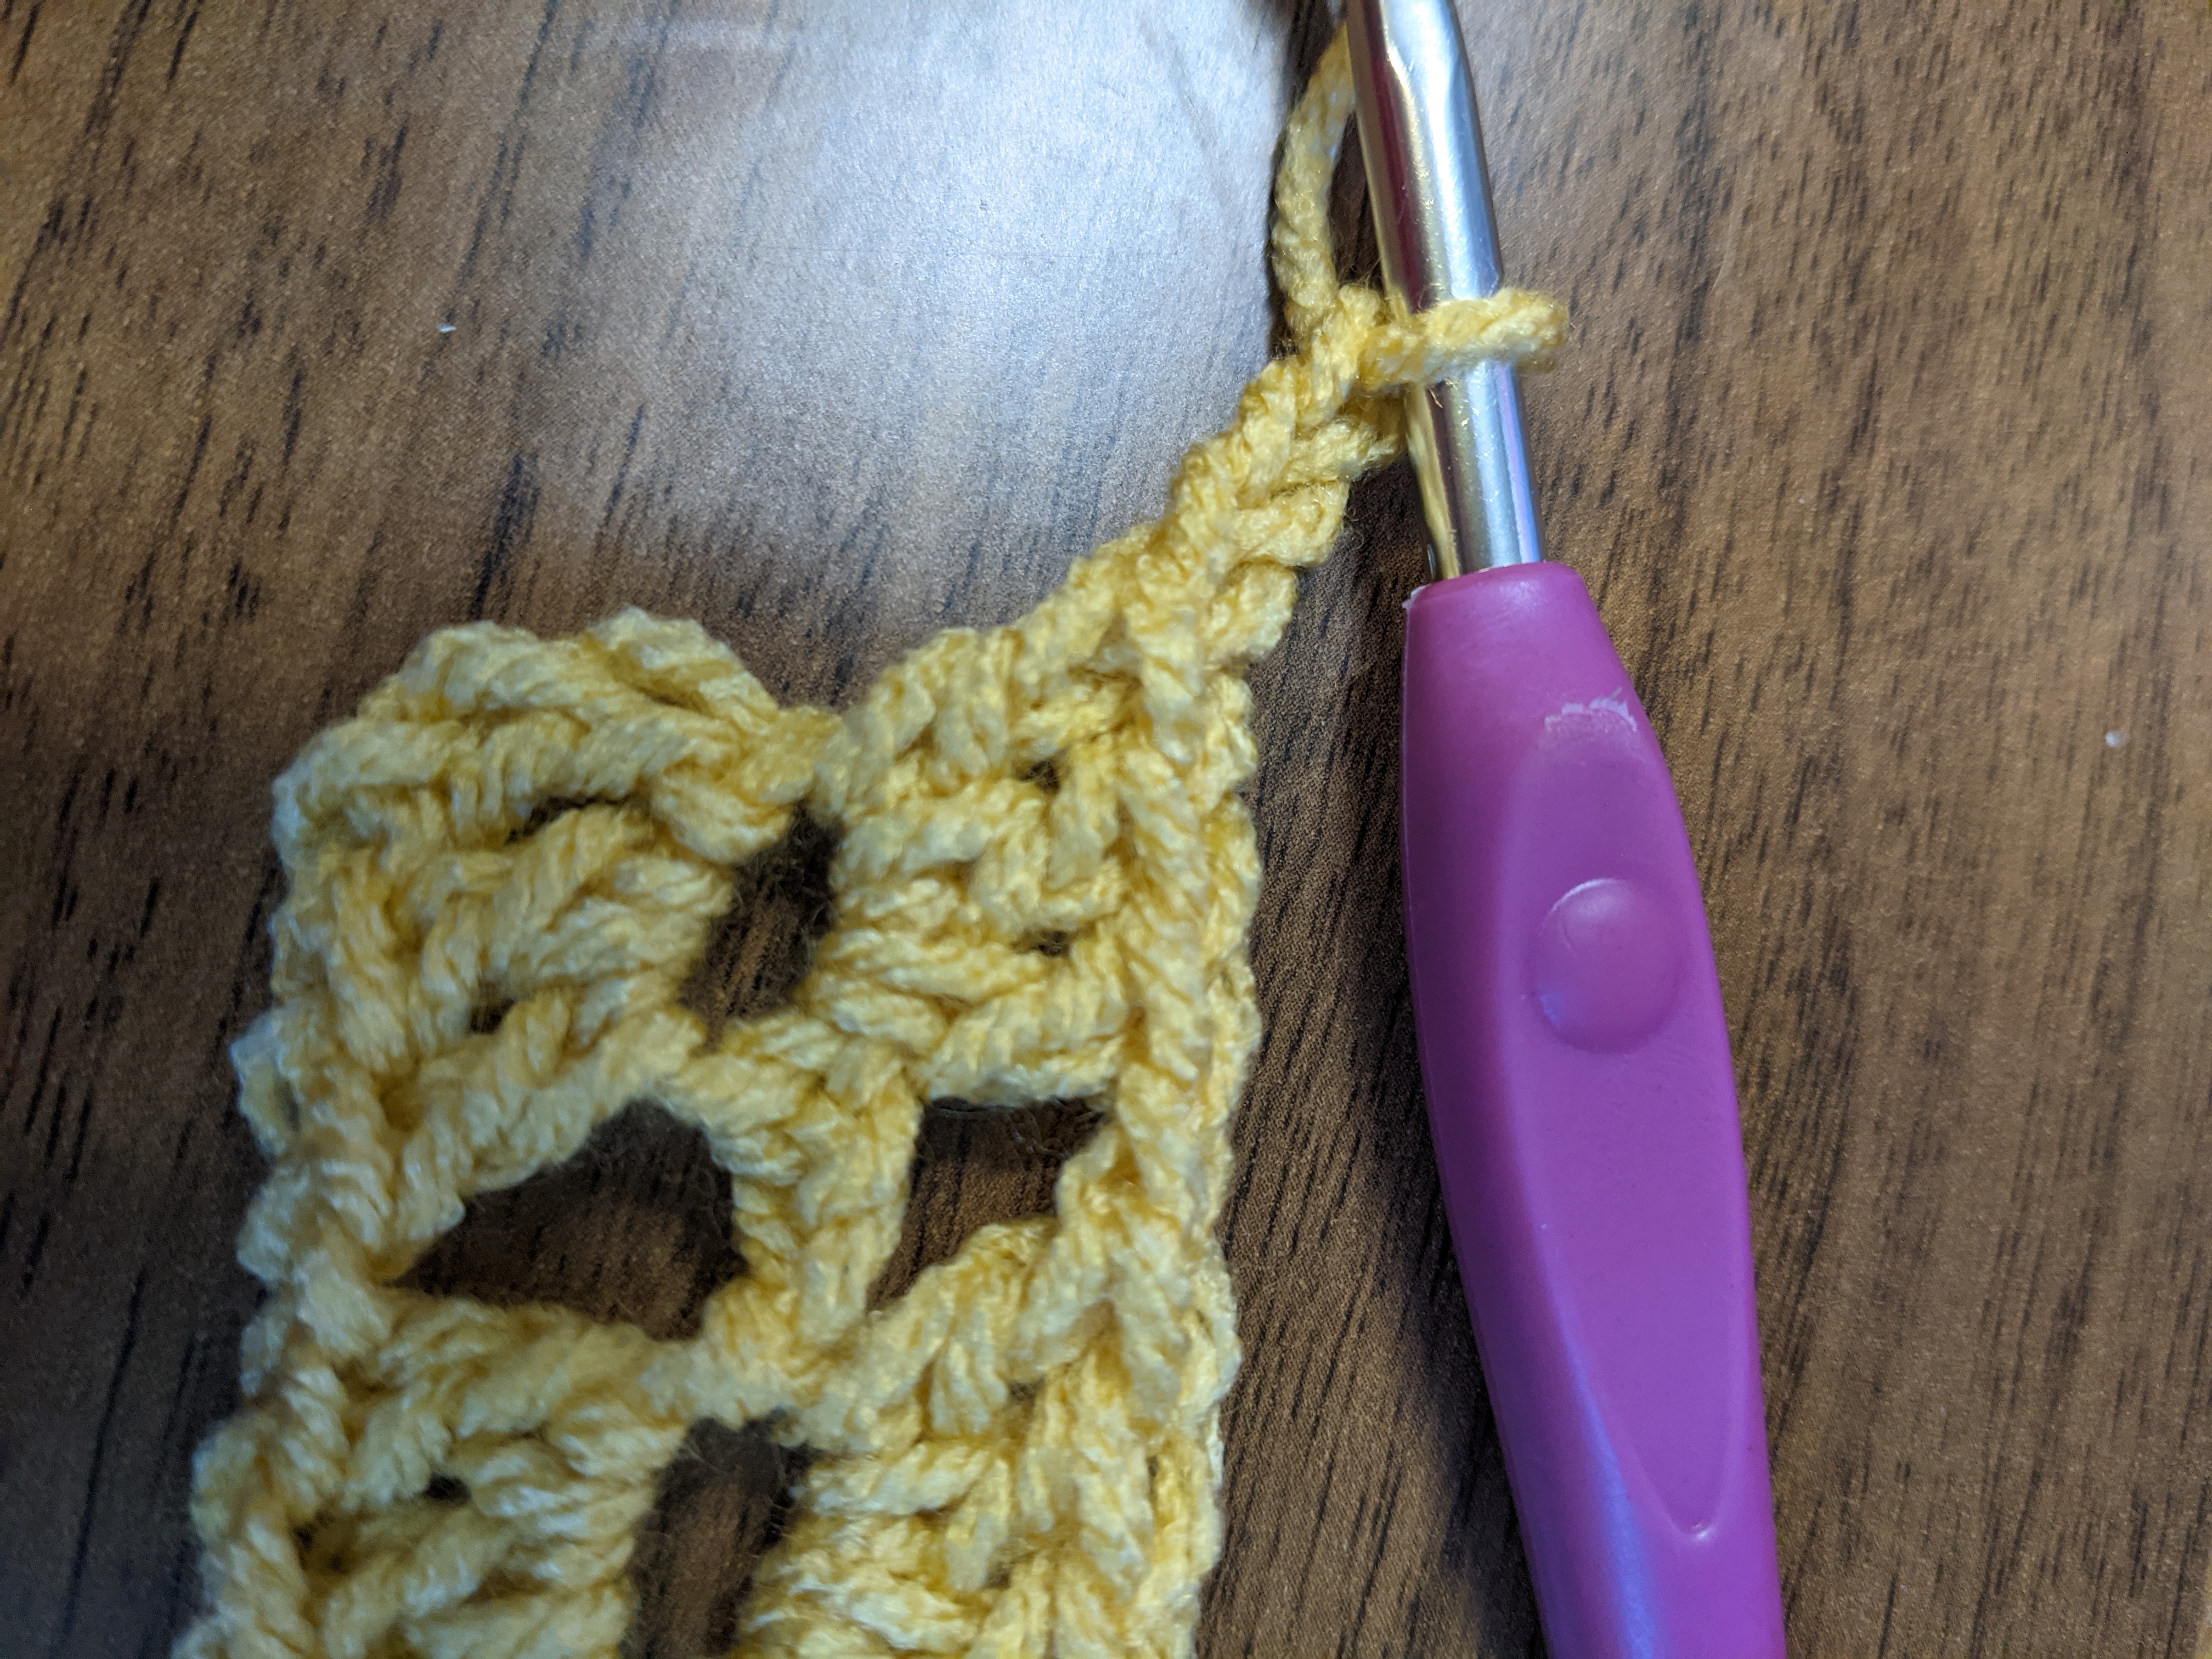
Place another 3dc into the same space. Ch 3 again. Now you will sl st to the beginning ch of this piece to start your next row. It will look as follows:
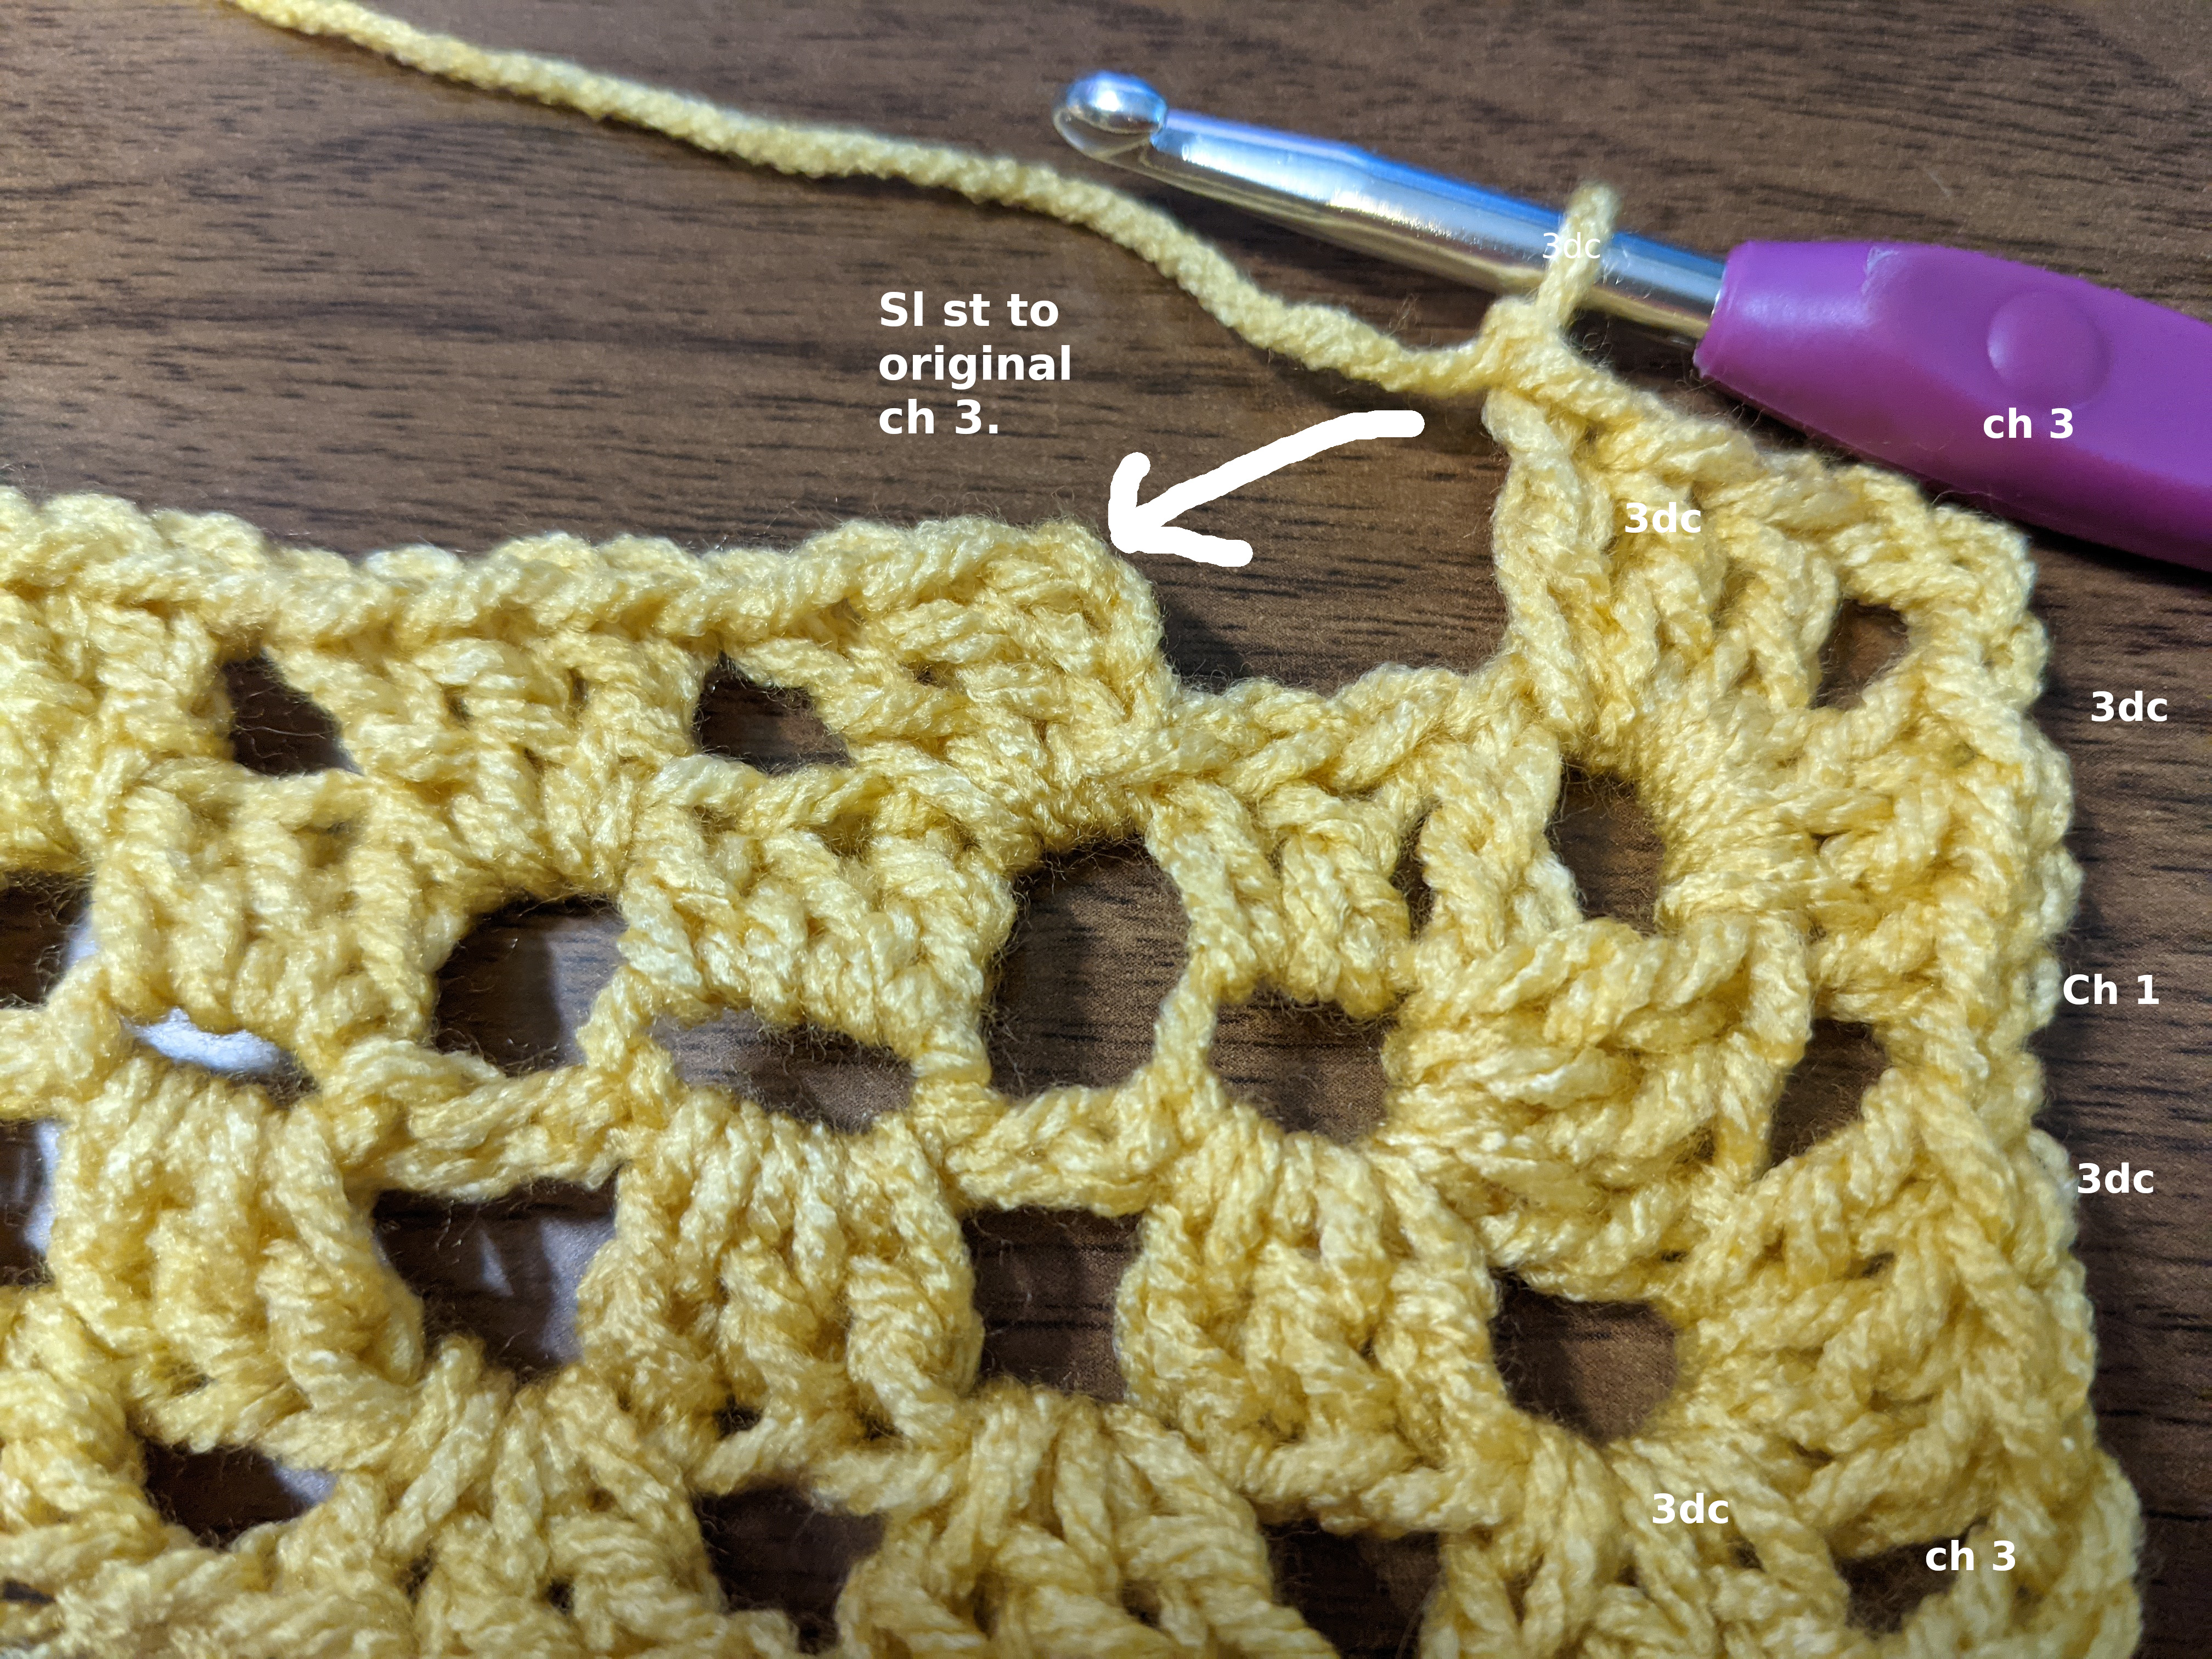
Row 2: Now to start row 2, you will want to sl st all the way over to your first ch 1 space. Into the ch 1 space from the previous row you will place a ch 3.
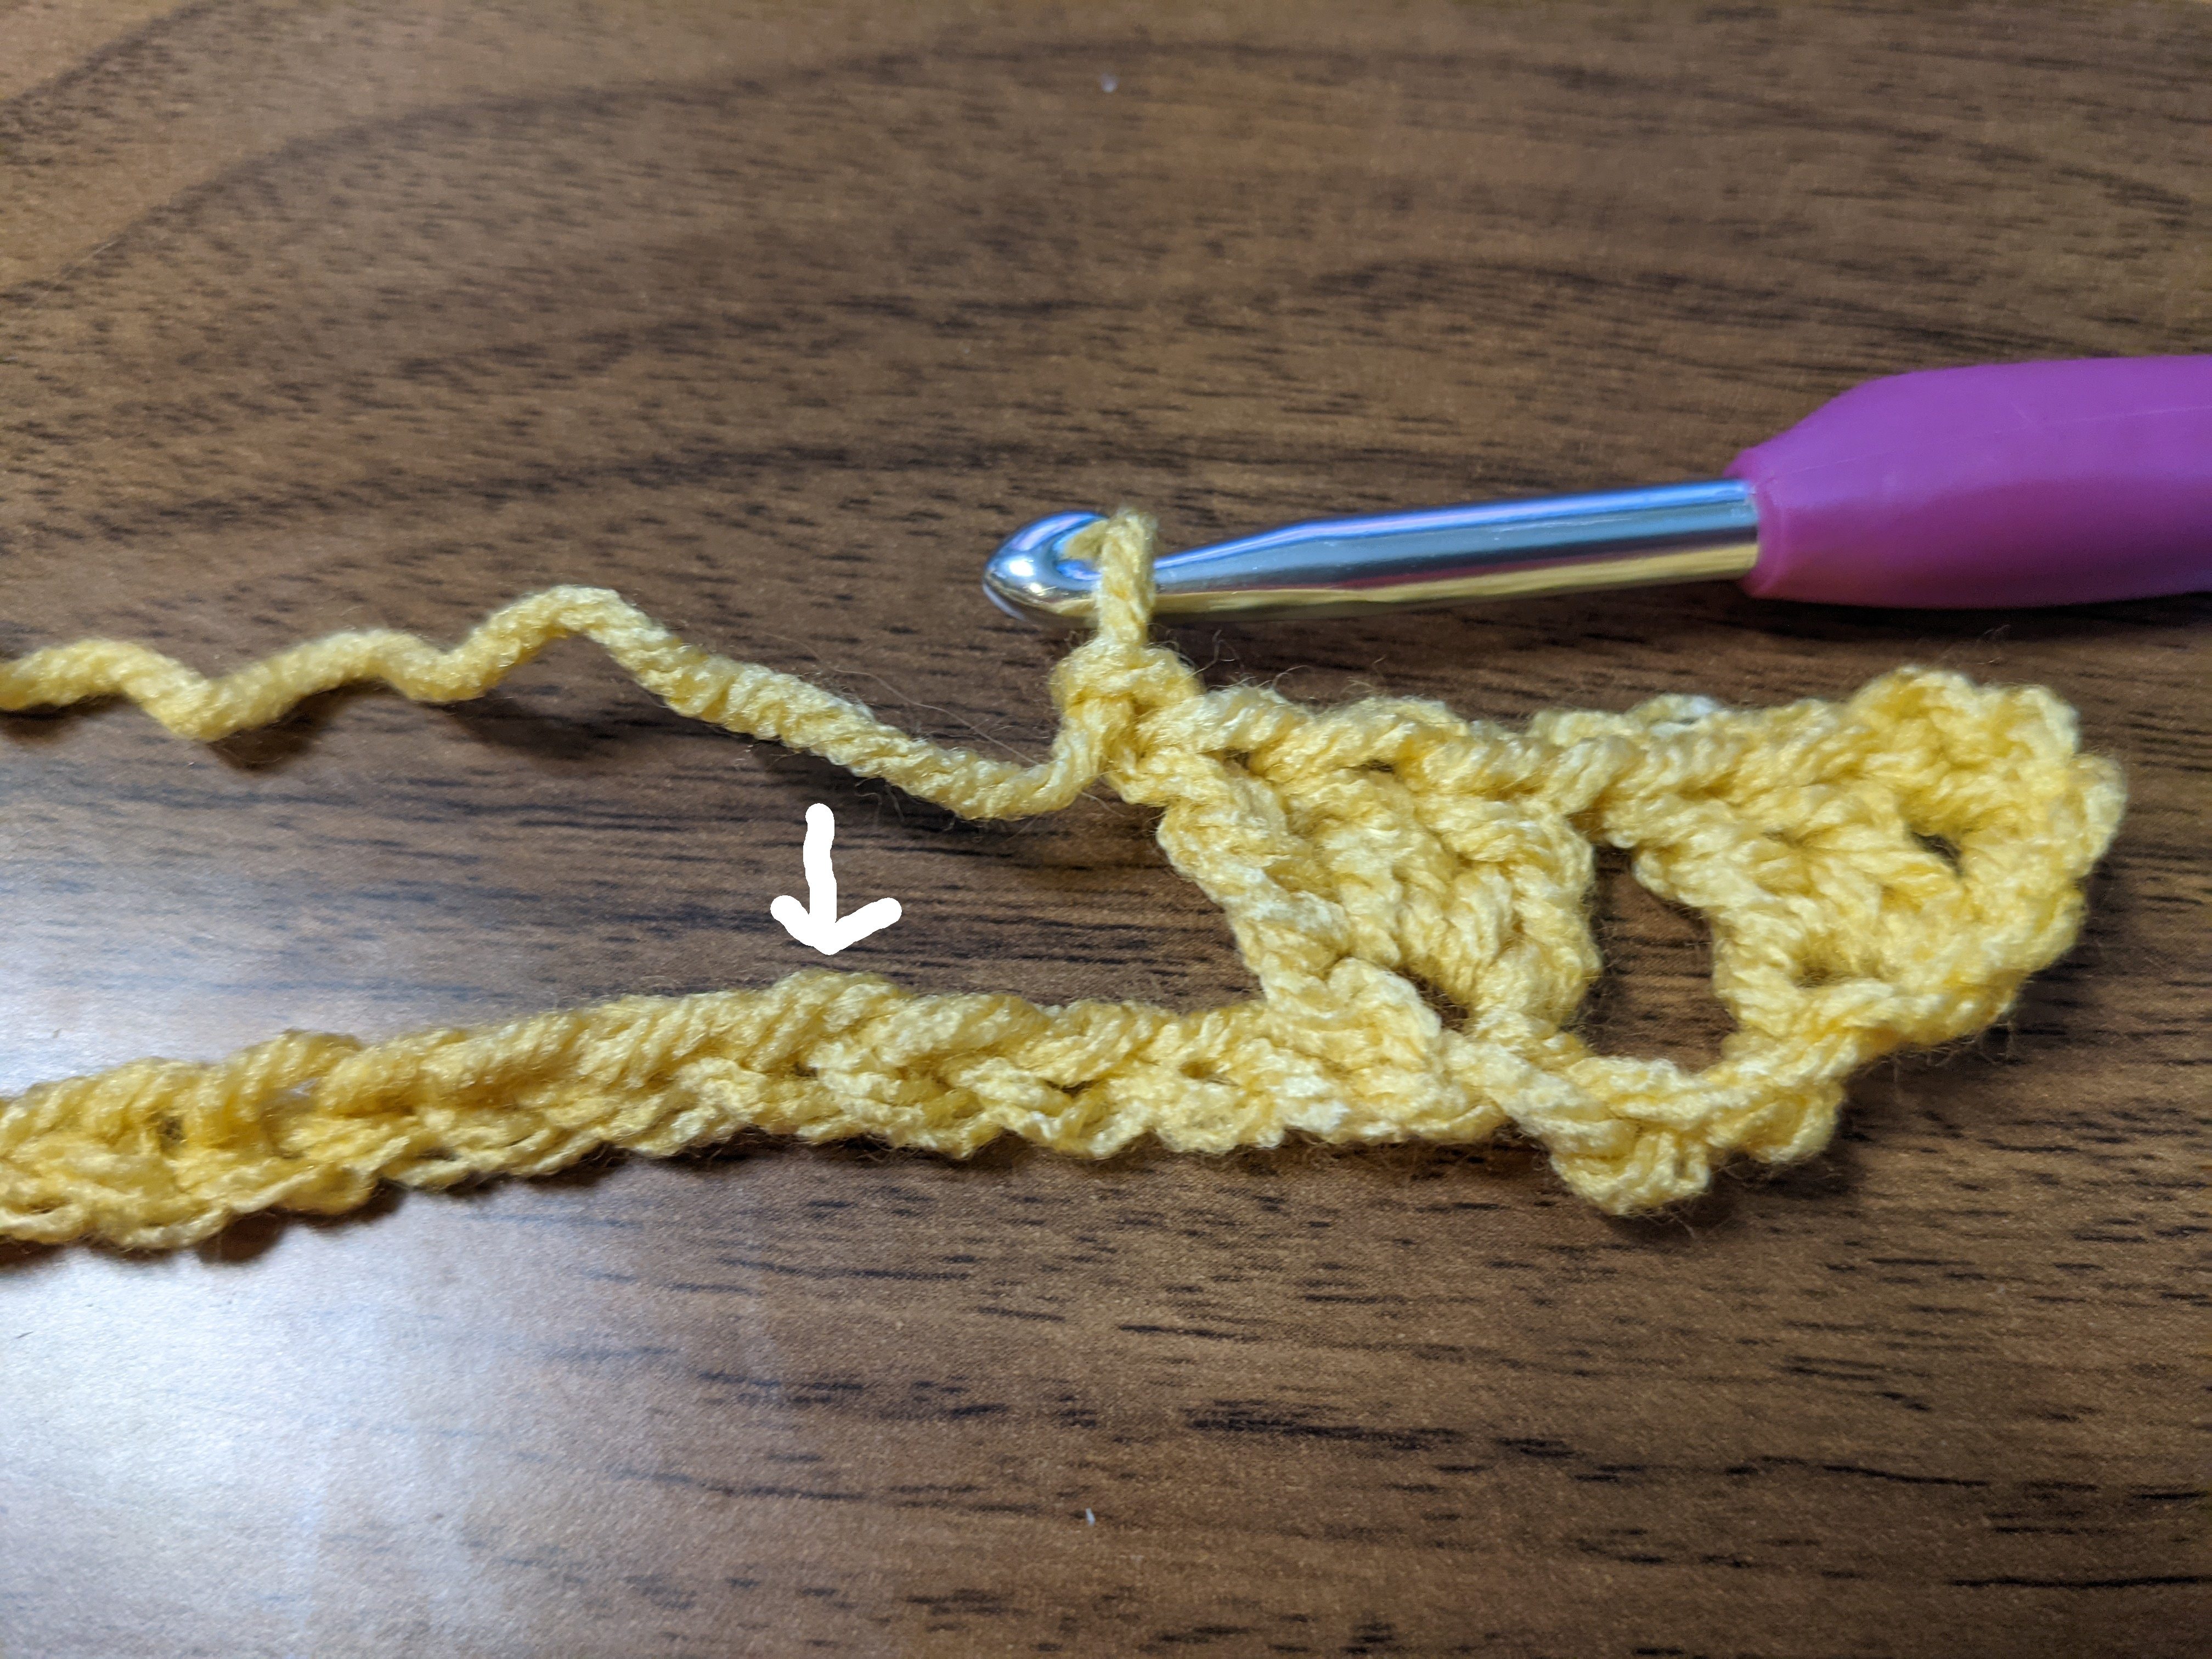
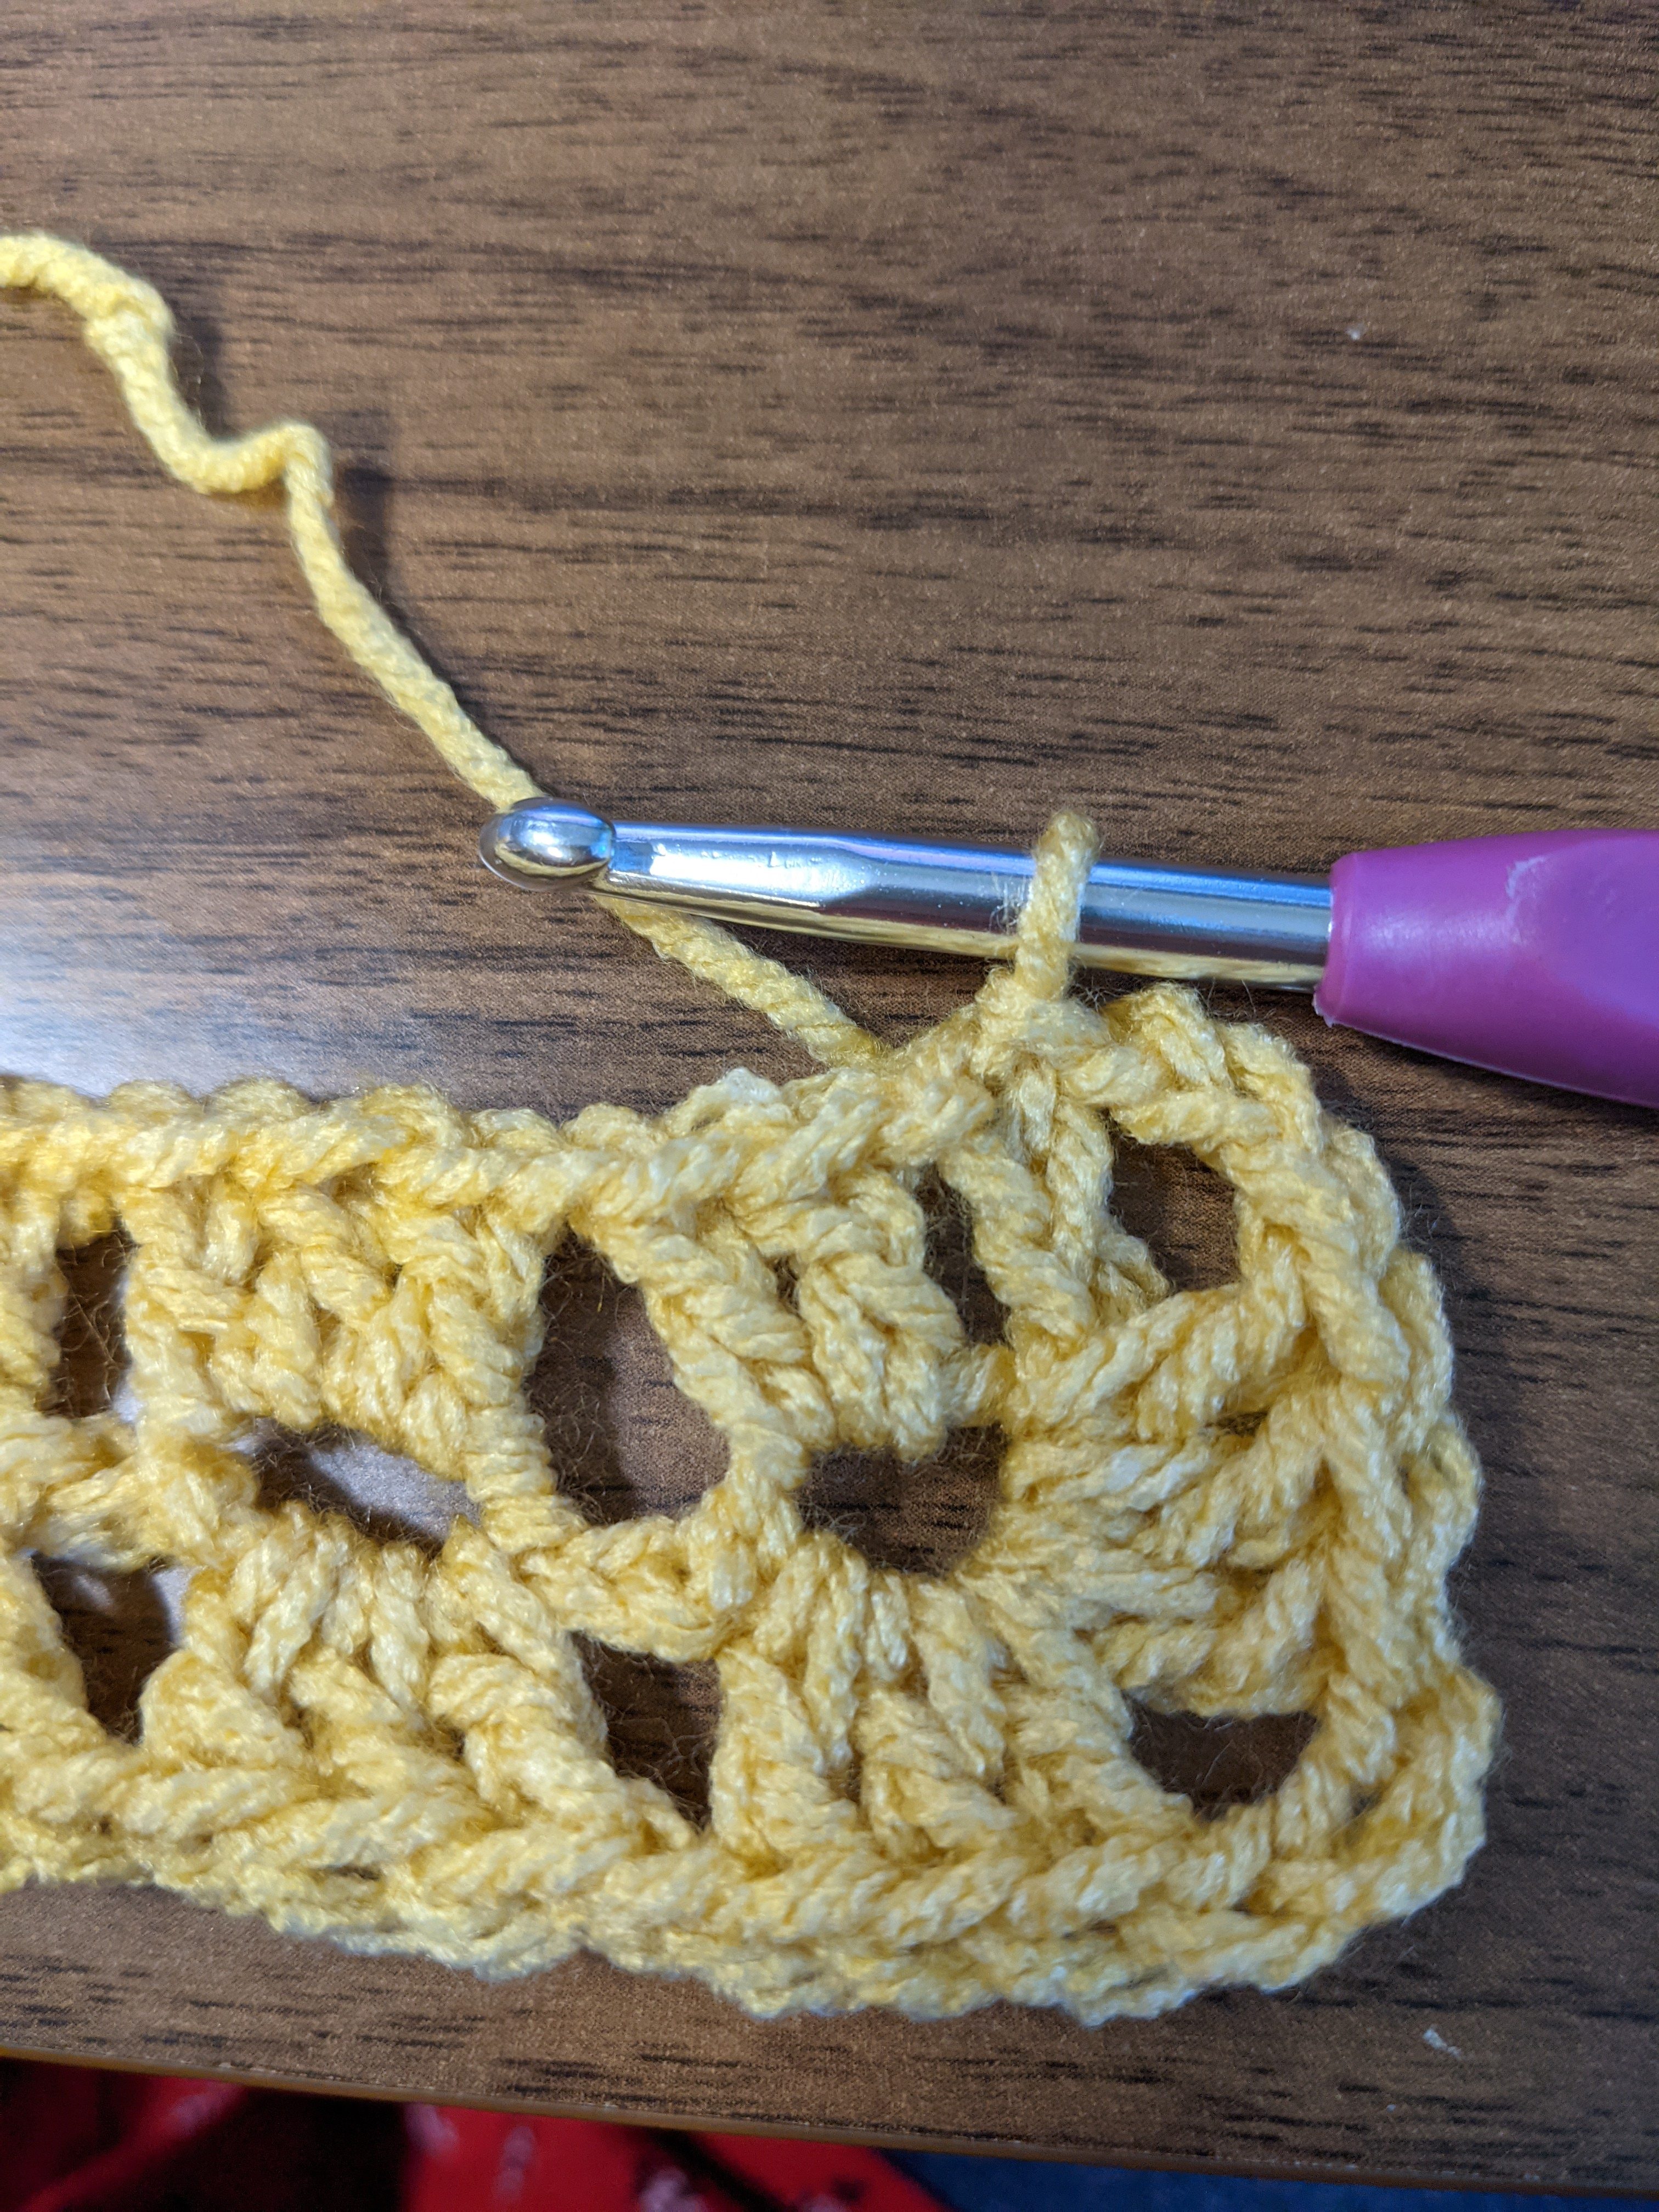
Work 2dc into the same space. This will create your first little cluster for the next row. Ch 1 and begin to work into the next ch 1 space from the previous row with a 3dc, ch 1. It will begin to look like this:
Work your way down placing 3dc, ch 1 into each ch 1 space from the previous round. Once you reach the end you will begin your corner and will work corners the same way from this point forth. In the ch 1 space from the previous round you will place 3dc, ch 3. Place an additional 3dc into the same space. Ch 1.
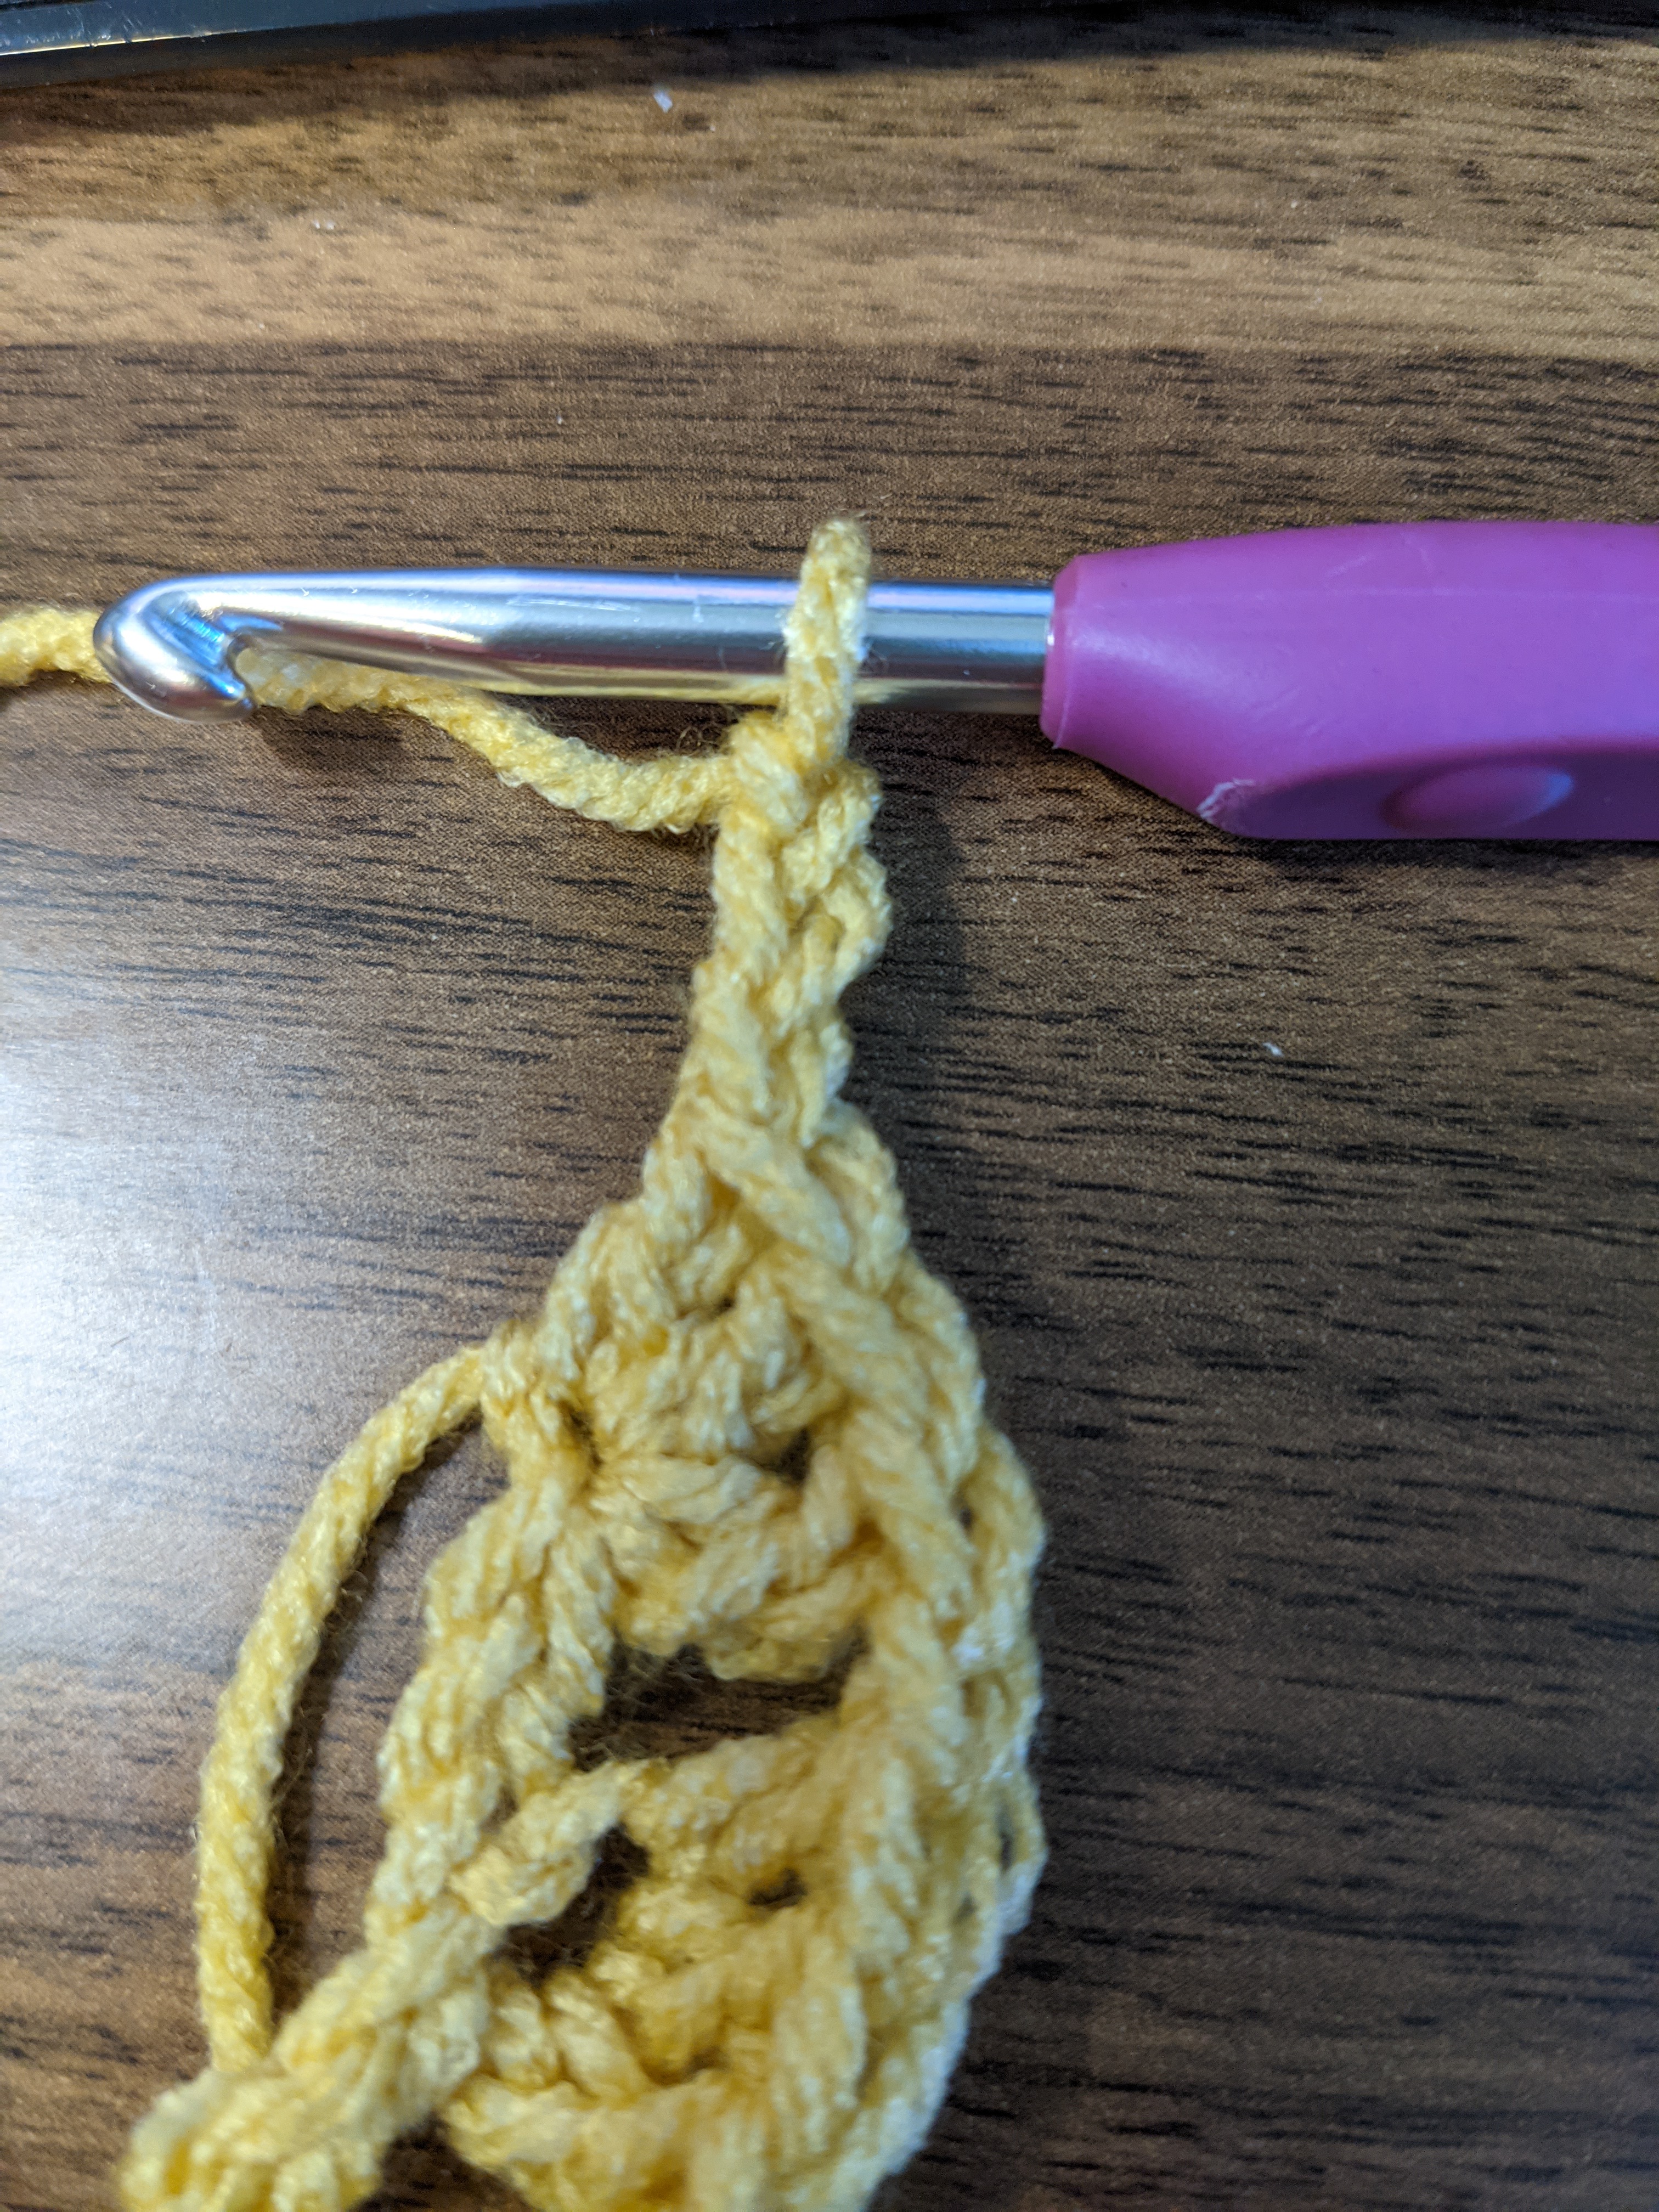
Now you will be at the opposite corner side, turning your piece along as you work. Place 3dc into the upcoming ch 1 space from the previous round. Ch 3. Place another 3dc.
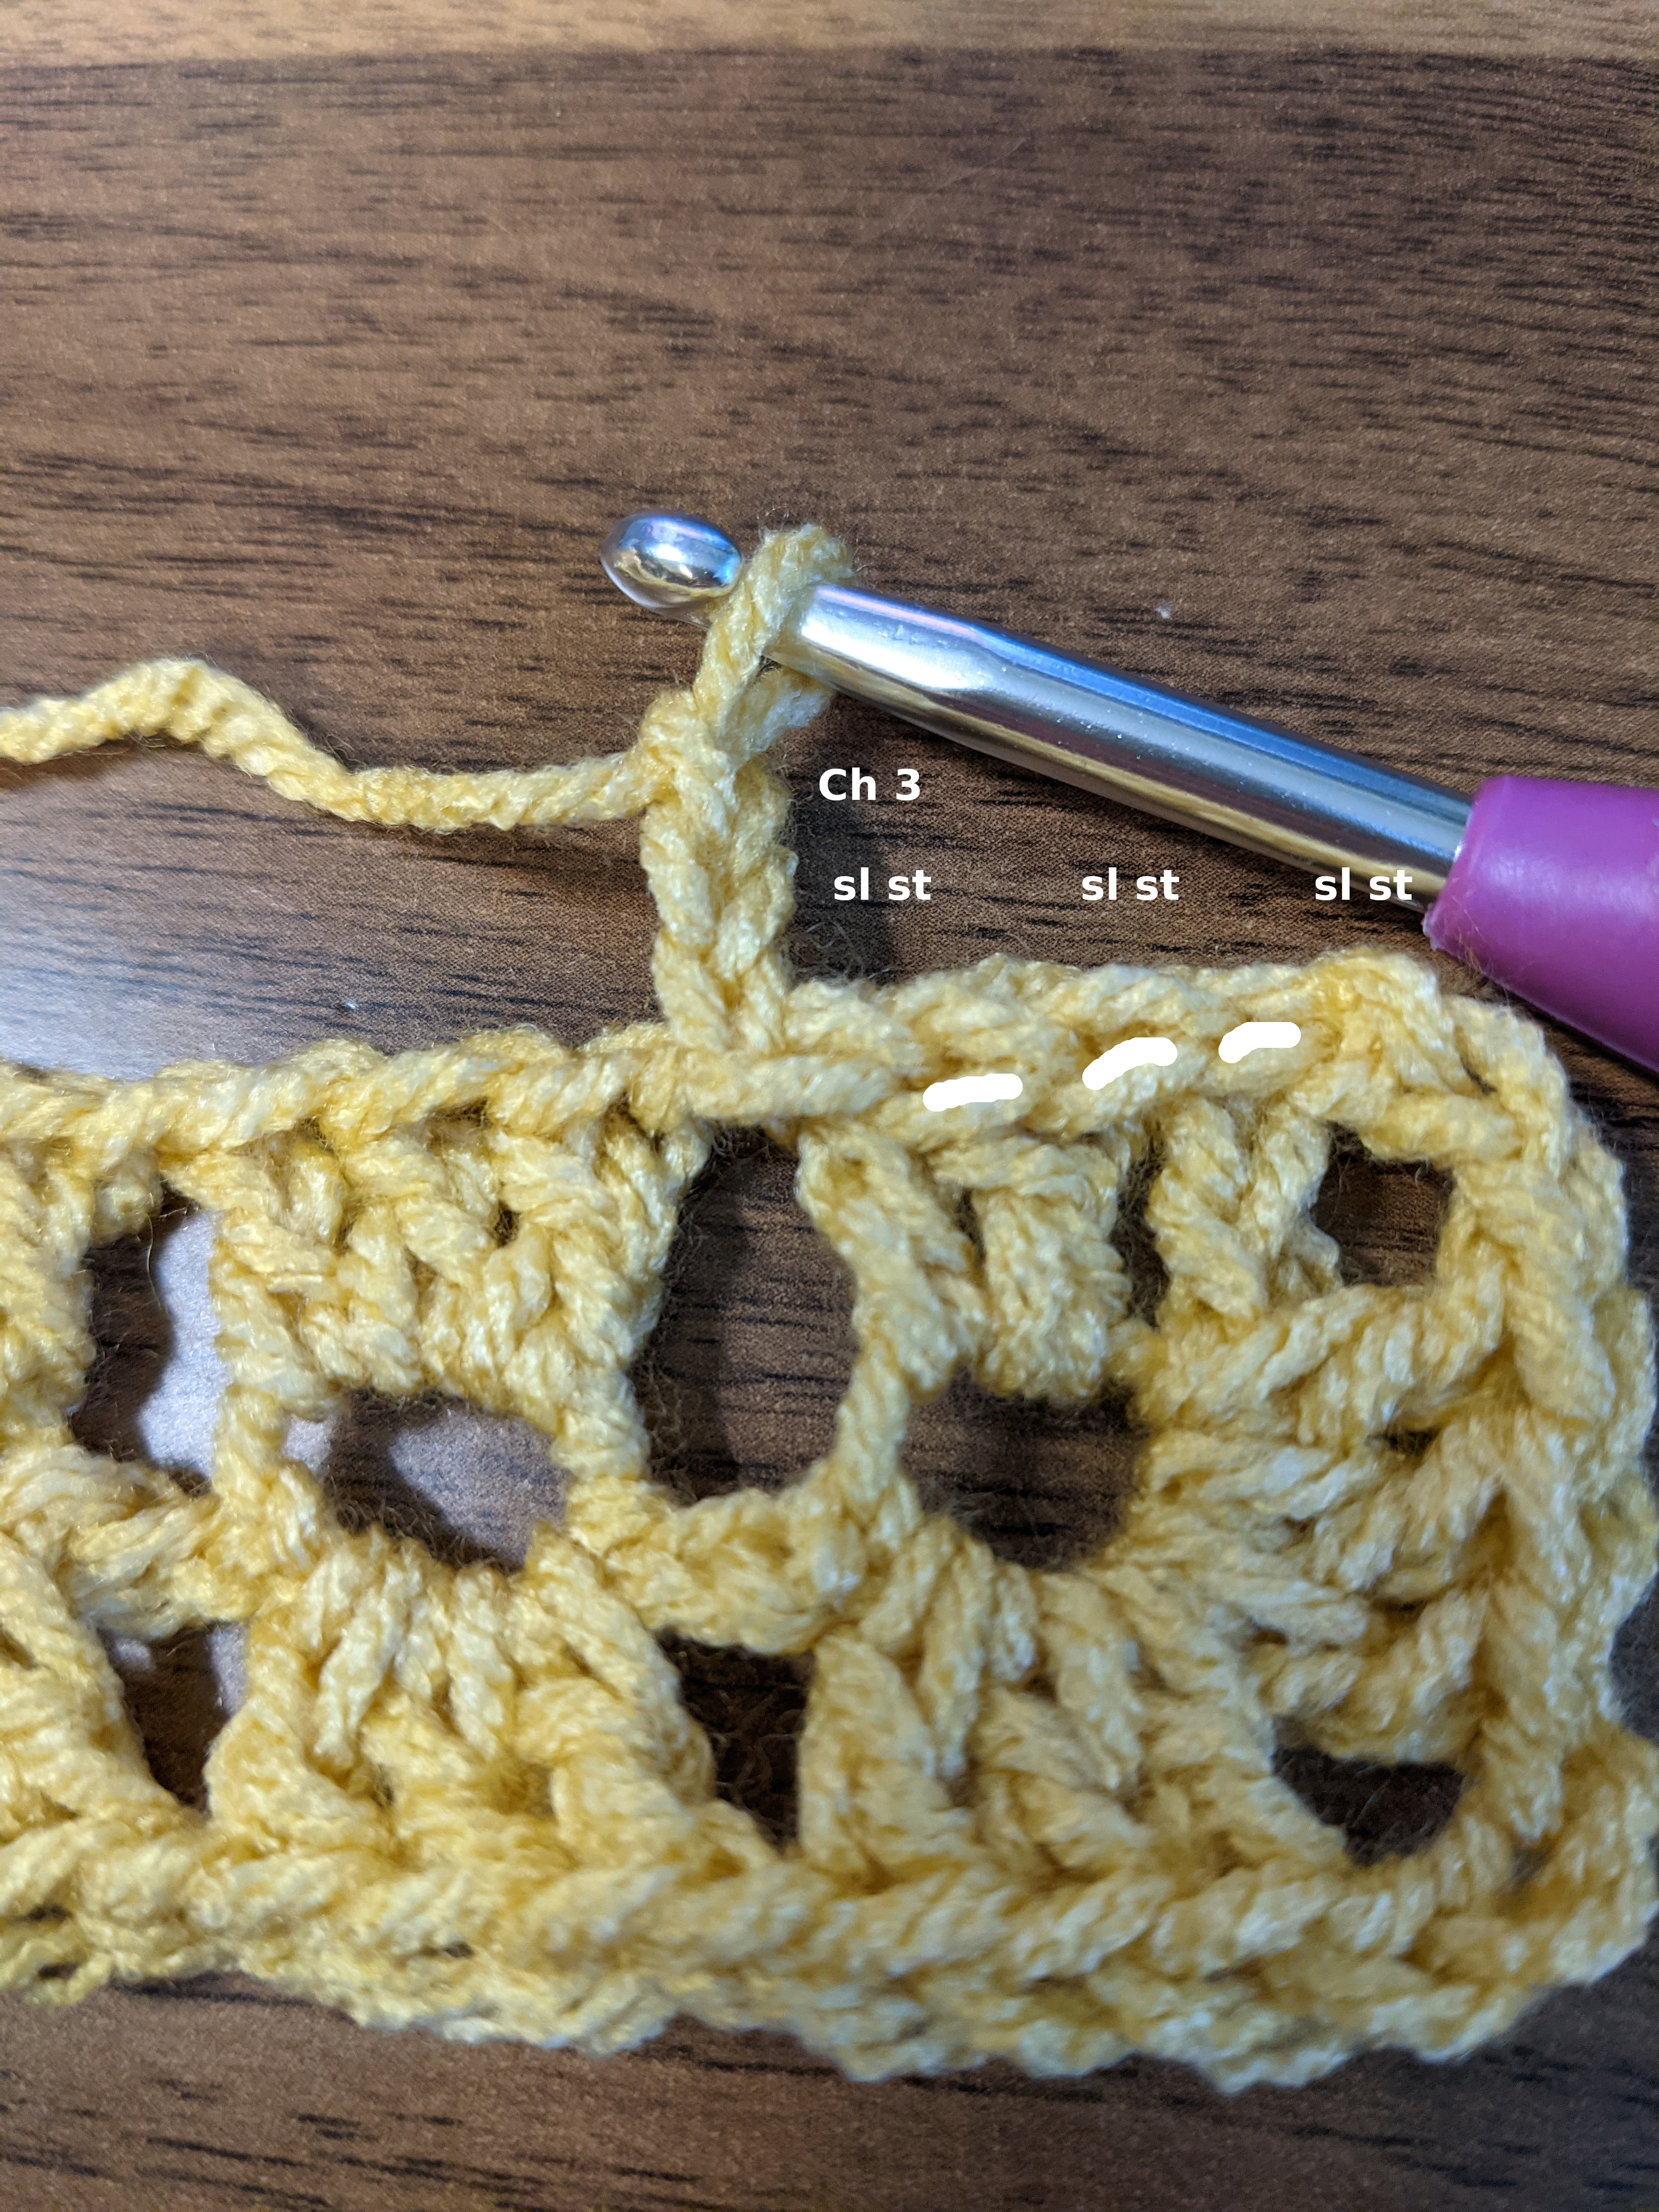
Finish with a ch 1 and begin to work on the next side. To start each row you will sl st your ch 1 to the previous ch 3 that started the row. Sl st into the dc sts until you reach the first open ch 1 gap to place your dc sts. To start your first one of the round place a ch 3 followed by 2dc and a ch 1. You will then continue to repeat the above steps of putting *3dc, ch 1* into each ch 1 space from the previous row. It should be noted that with each corner, you will continue to place a 3dc, ch 3, 3dc, into each corner space. As the blanket is worked up, you will begin to work more clusters into the side between the corners and have more ch 1 spaces to work into. After each corner is completed (the 3dc, ch 3, 3dc) you will ch 1. If there are previous row ch 1 spaces, work a normal cluster (3dc, ch 1) into those. Once you hit the next corner, continue to place your 3dc, ch 3, 3dc into the corner space and work towards the next row into the ch 1 spaces.
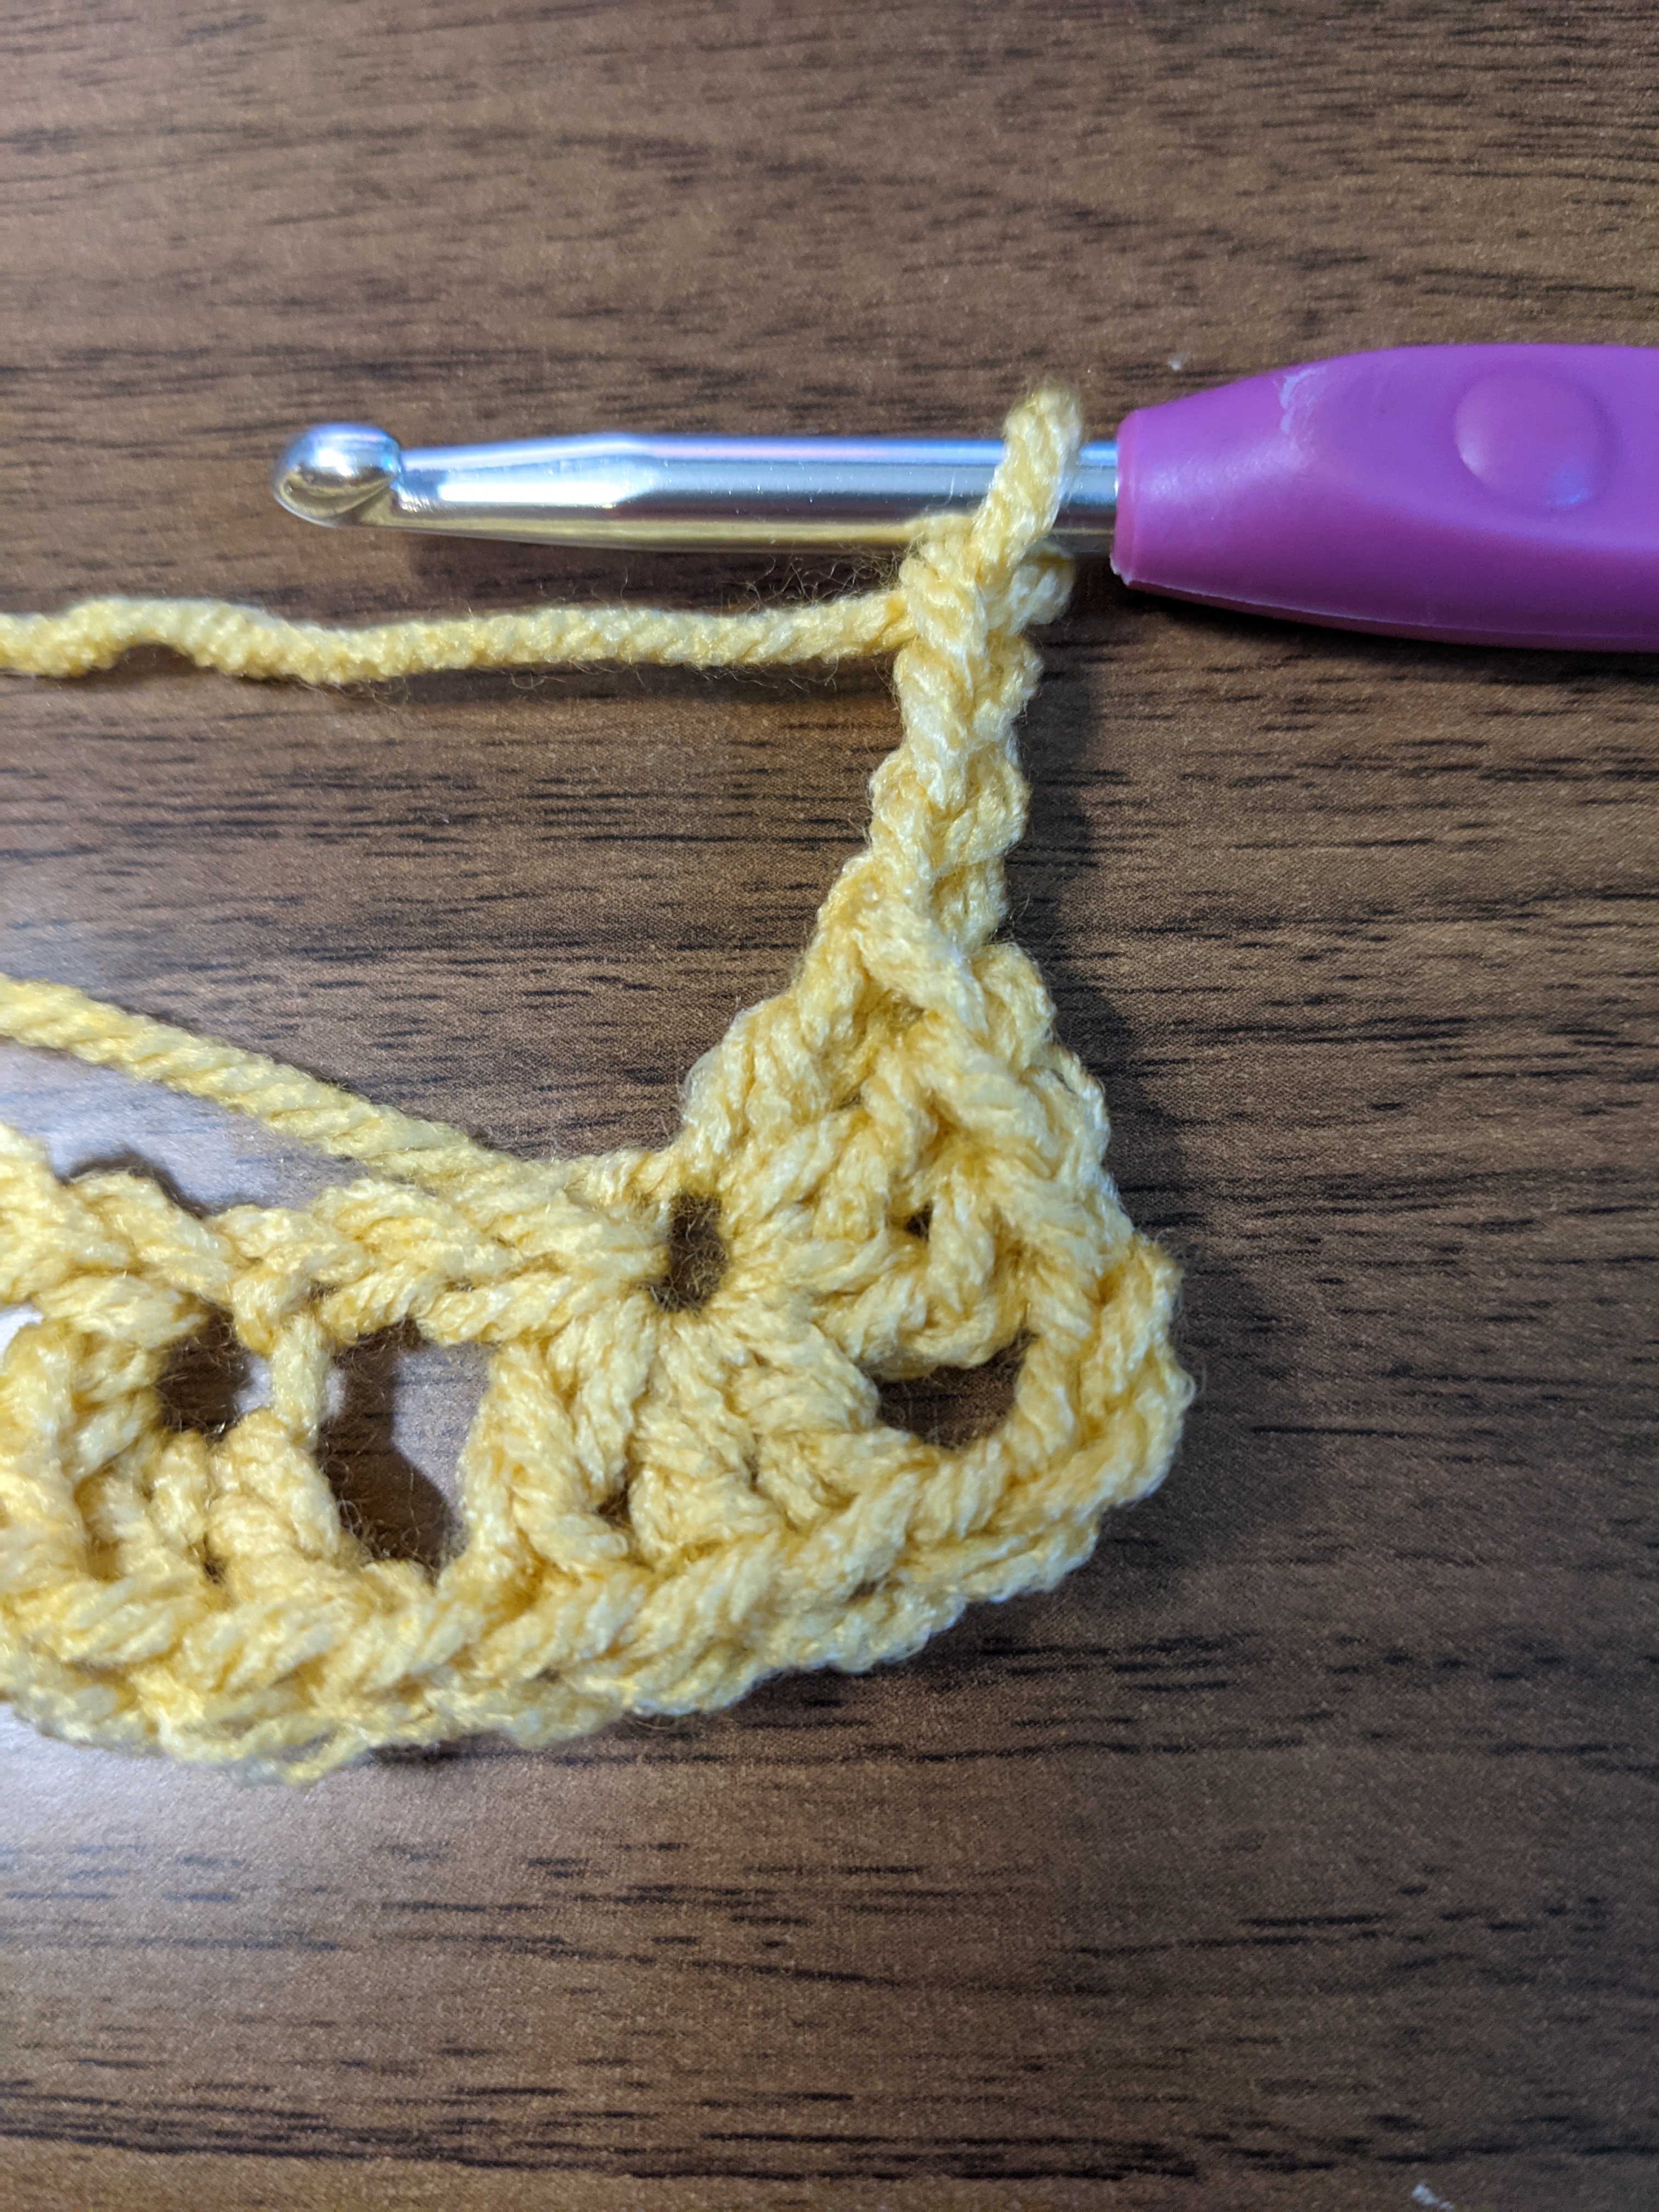
Row 3: Continue on rows just as listed above in row 2. Sl st all the way over until you meet the next ch 1 space and work your *3dc, ch 1* cluster into the space. Repeat around.
As you complete each row, the sides and spacing between corners will gradually grow. Work this blanket around to desired length, ending with a sl st to your ch 3 place on the blanket. This will even things out. For my baby blankets I worked up roughly 24 rounds measuring at 28 inches x 38 inches (before bordering).
To create the first basic border I worked around the blanket as follows:
Starting on the shortest side:
Side 1: hdc around placing 3 hdc in every corner (95 hdc plus 3 corner)
Side 2 (longest side): hdc around placing 3hdc in the corner (123 plus 3 in corner)
Sides 3 and 4: Repeat steps 1 and 2.
Starting back to shortest side:
Side 1: hdc around placing 3 hdc in every corner (97 plus 3 corner)
Side 2 (longest side): hdc around placing 3hdc in the corner (125 plus 3 in corner)
Sides 3 and 4: Repeat steps 1 and 2.
Starting back to shortest side:
Side 1: hdc around placing 3 hdc in every corner (99 hdc plus 3 corner)
Side 2 (longest side): hdc around placing 3hdc in the corner (127 plus 3 in corner)
Sides 3 and 4: Repeat steps 1 and 2.
Final border around: Now to finish the entirety of the blanket, place a final sc border around the entire blanket being sure to place 3sc in each corner st. Fasten off and weave in all ends of the blanket.
For the shell border I worked around the blanket as follows:
Starting on the shortest side:
Side 1: sc around placing 3 sc in every corner (95 plus 3 corner)
Side 2 (longest side): sc around placing 3sc in the corner (123 plus 3 in corner)
Sides 3 and 4: Repeat steps 1 and 2.
For my blanket I stopped here, but if you’d like a thicker border, feel free to repeat steps 1-4 one more time.
Now you will work the shells
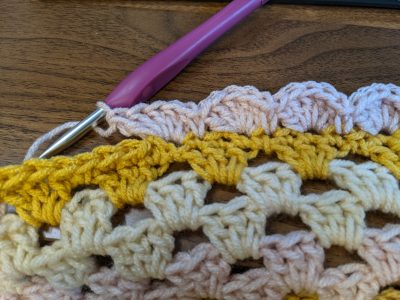
Starting where you left off place one sc in the first st, in the next st place 5dc. Skip the following st and in the next st place a sc. You will just repeat this pattern around the entire edge of the blanket including the corners. No need to add additional stitches there! Just follow (sc, 5dc, skip st) and repeat.
The finished measurement may vary depending on your border and whether or not you added or subtracted a row, but my blankets ended up having a finished measurement of 34 inches by 43 inches. Perfect for babies and toddlers!
And really, this classic granny stitch is perfect for more than just baby blankets! Get creative with it. Want to do an afghan? Just add a couple more skeins and continue on until you find your desired length. In the past I’ve even made twin sized blankets with this great stitch. It’s just so satisfying and fun and with all the new self-striping yarns available, it couldn’t be more simple!
Happy crocheting!
All designs & pictures are copyrighted by To Craft A Home 2021. Pattern is for personal use only and can’t be resold, republished, or redistributed in any way. You may sell the finished project if you so desire, but please give credit and link to my website www.tocraftahome.com or my etsy www.tocraftahome.etsy.com
Find more of my patterns on Ravelry: https://www.ravelry.com/people/ToCraftAHome