
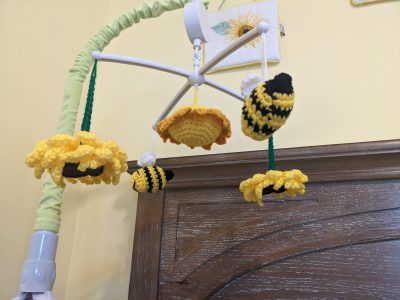
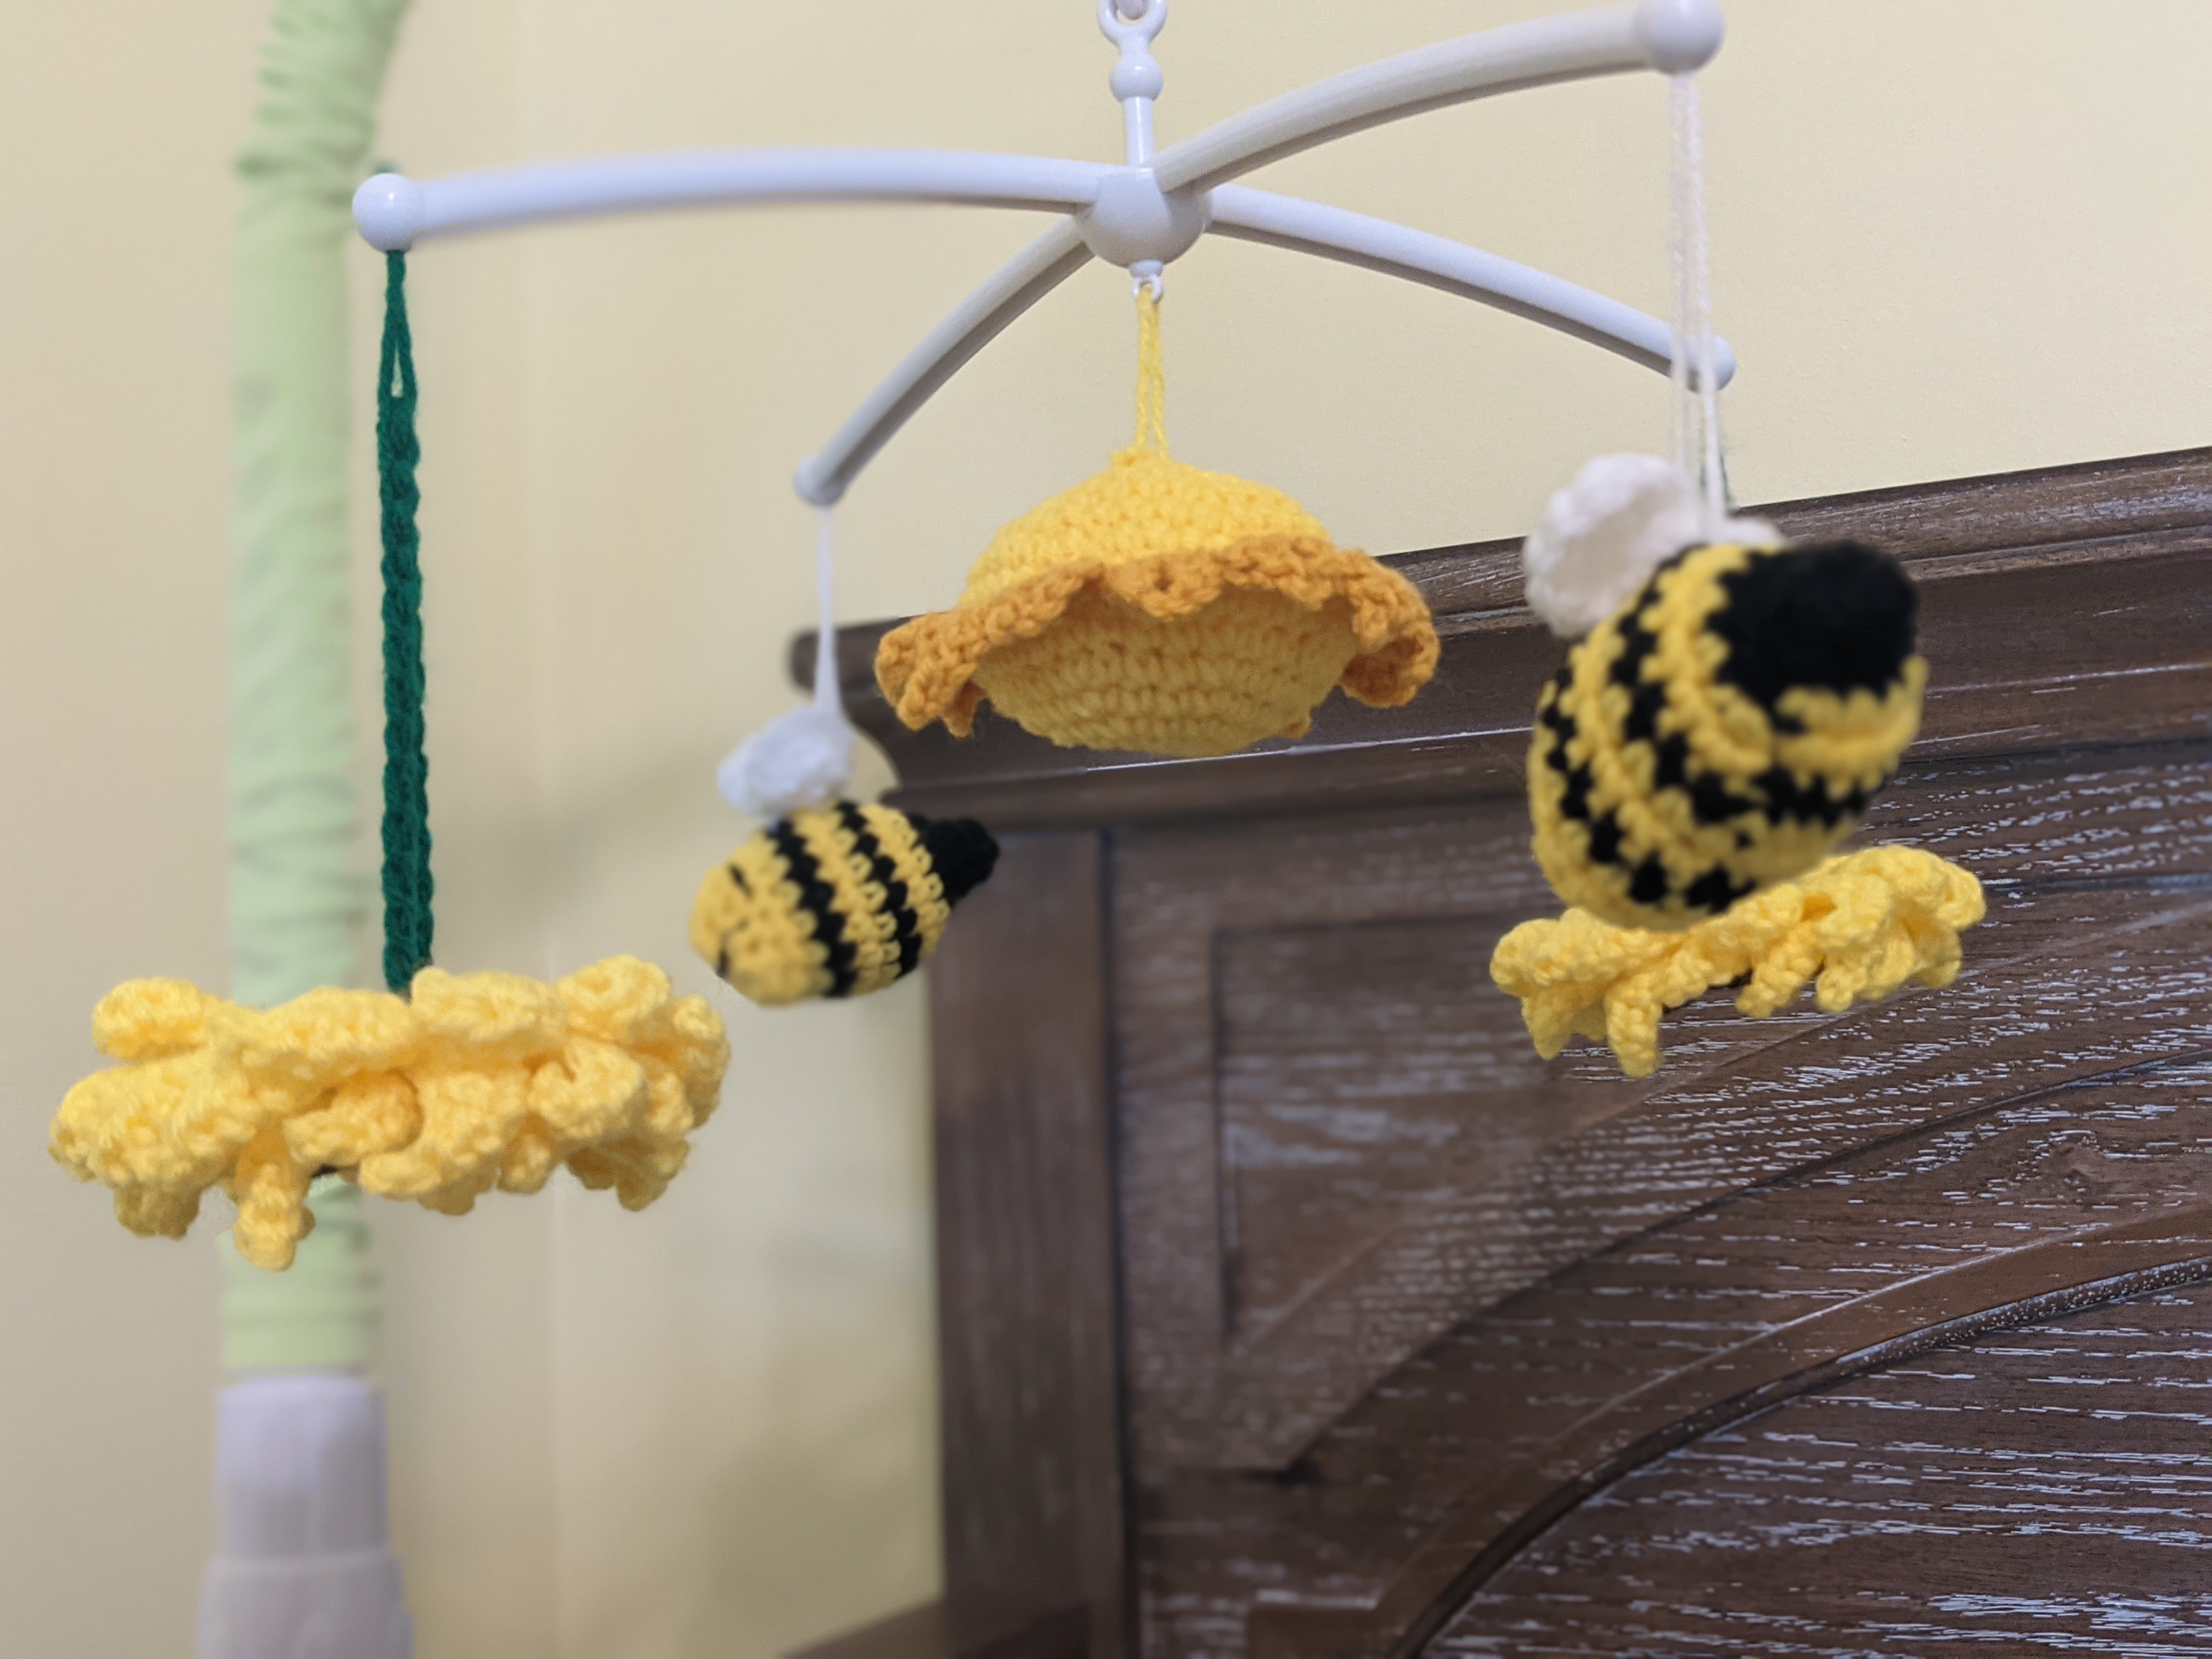
As the days dwindle down in my pregnancy I’m putting together the last pieces to our baby’s nursery. All must be in its rightful place, organized, and completely ready for baby. I’ve been reflecting back to the whole process of putting together this living space. So much work went into it and I’m very excited to start using it with our baby. Everything came together relatively fast once our theme was chosen and one could argue that was the most difficult part about assembling said nursery! My husband and I figured it out quite quickly when we discovered we were having another baby girl a couple months back. An August baby certainly called for sunflowers and bees. Then came the idea to make her a mobile inspired by the decor of her nursery. If anyone else is expecting a summer baby like me, or just loves everything to do with sunflowers and bees, this might be the pattern for you!
Materials:
-3.5mm and 4.5mm crochet hook
-Worsted weight yarn in colors yellow, gold, dark brown, black, dark green, and white
-Polyfil stuffing
-Embroidery needle
-Mobile (I bought this one from Amazon, but any that will work with your crib will be just fine https://www.amazon.com/gp/product/B086J5DD4K )
– Optional: Mobile cover (I bought this one to go along with the color scheme of the nursery https://www.amazon.com/gp/product/B07YJCTQR4 )
***Any mobile will work, but be aware that there may be different attachment methods when it comes to the mobile arms that hold each piece. Some have hooks holding onto the items (I used the braid method for those types) and others like the one I have listed and ultimately used will benefit more from a single strand of yarn for tying directly through the mobile arm holes. Any mobile will work perfectly though and if you’re like me, finding one that will play the perfect melodies for your baby’s nursery is ideal!
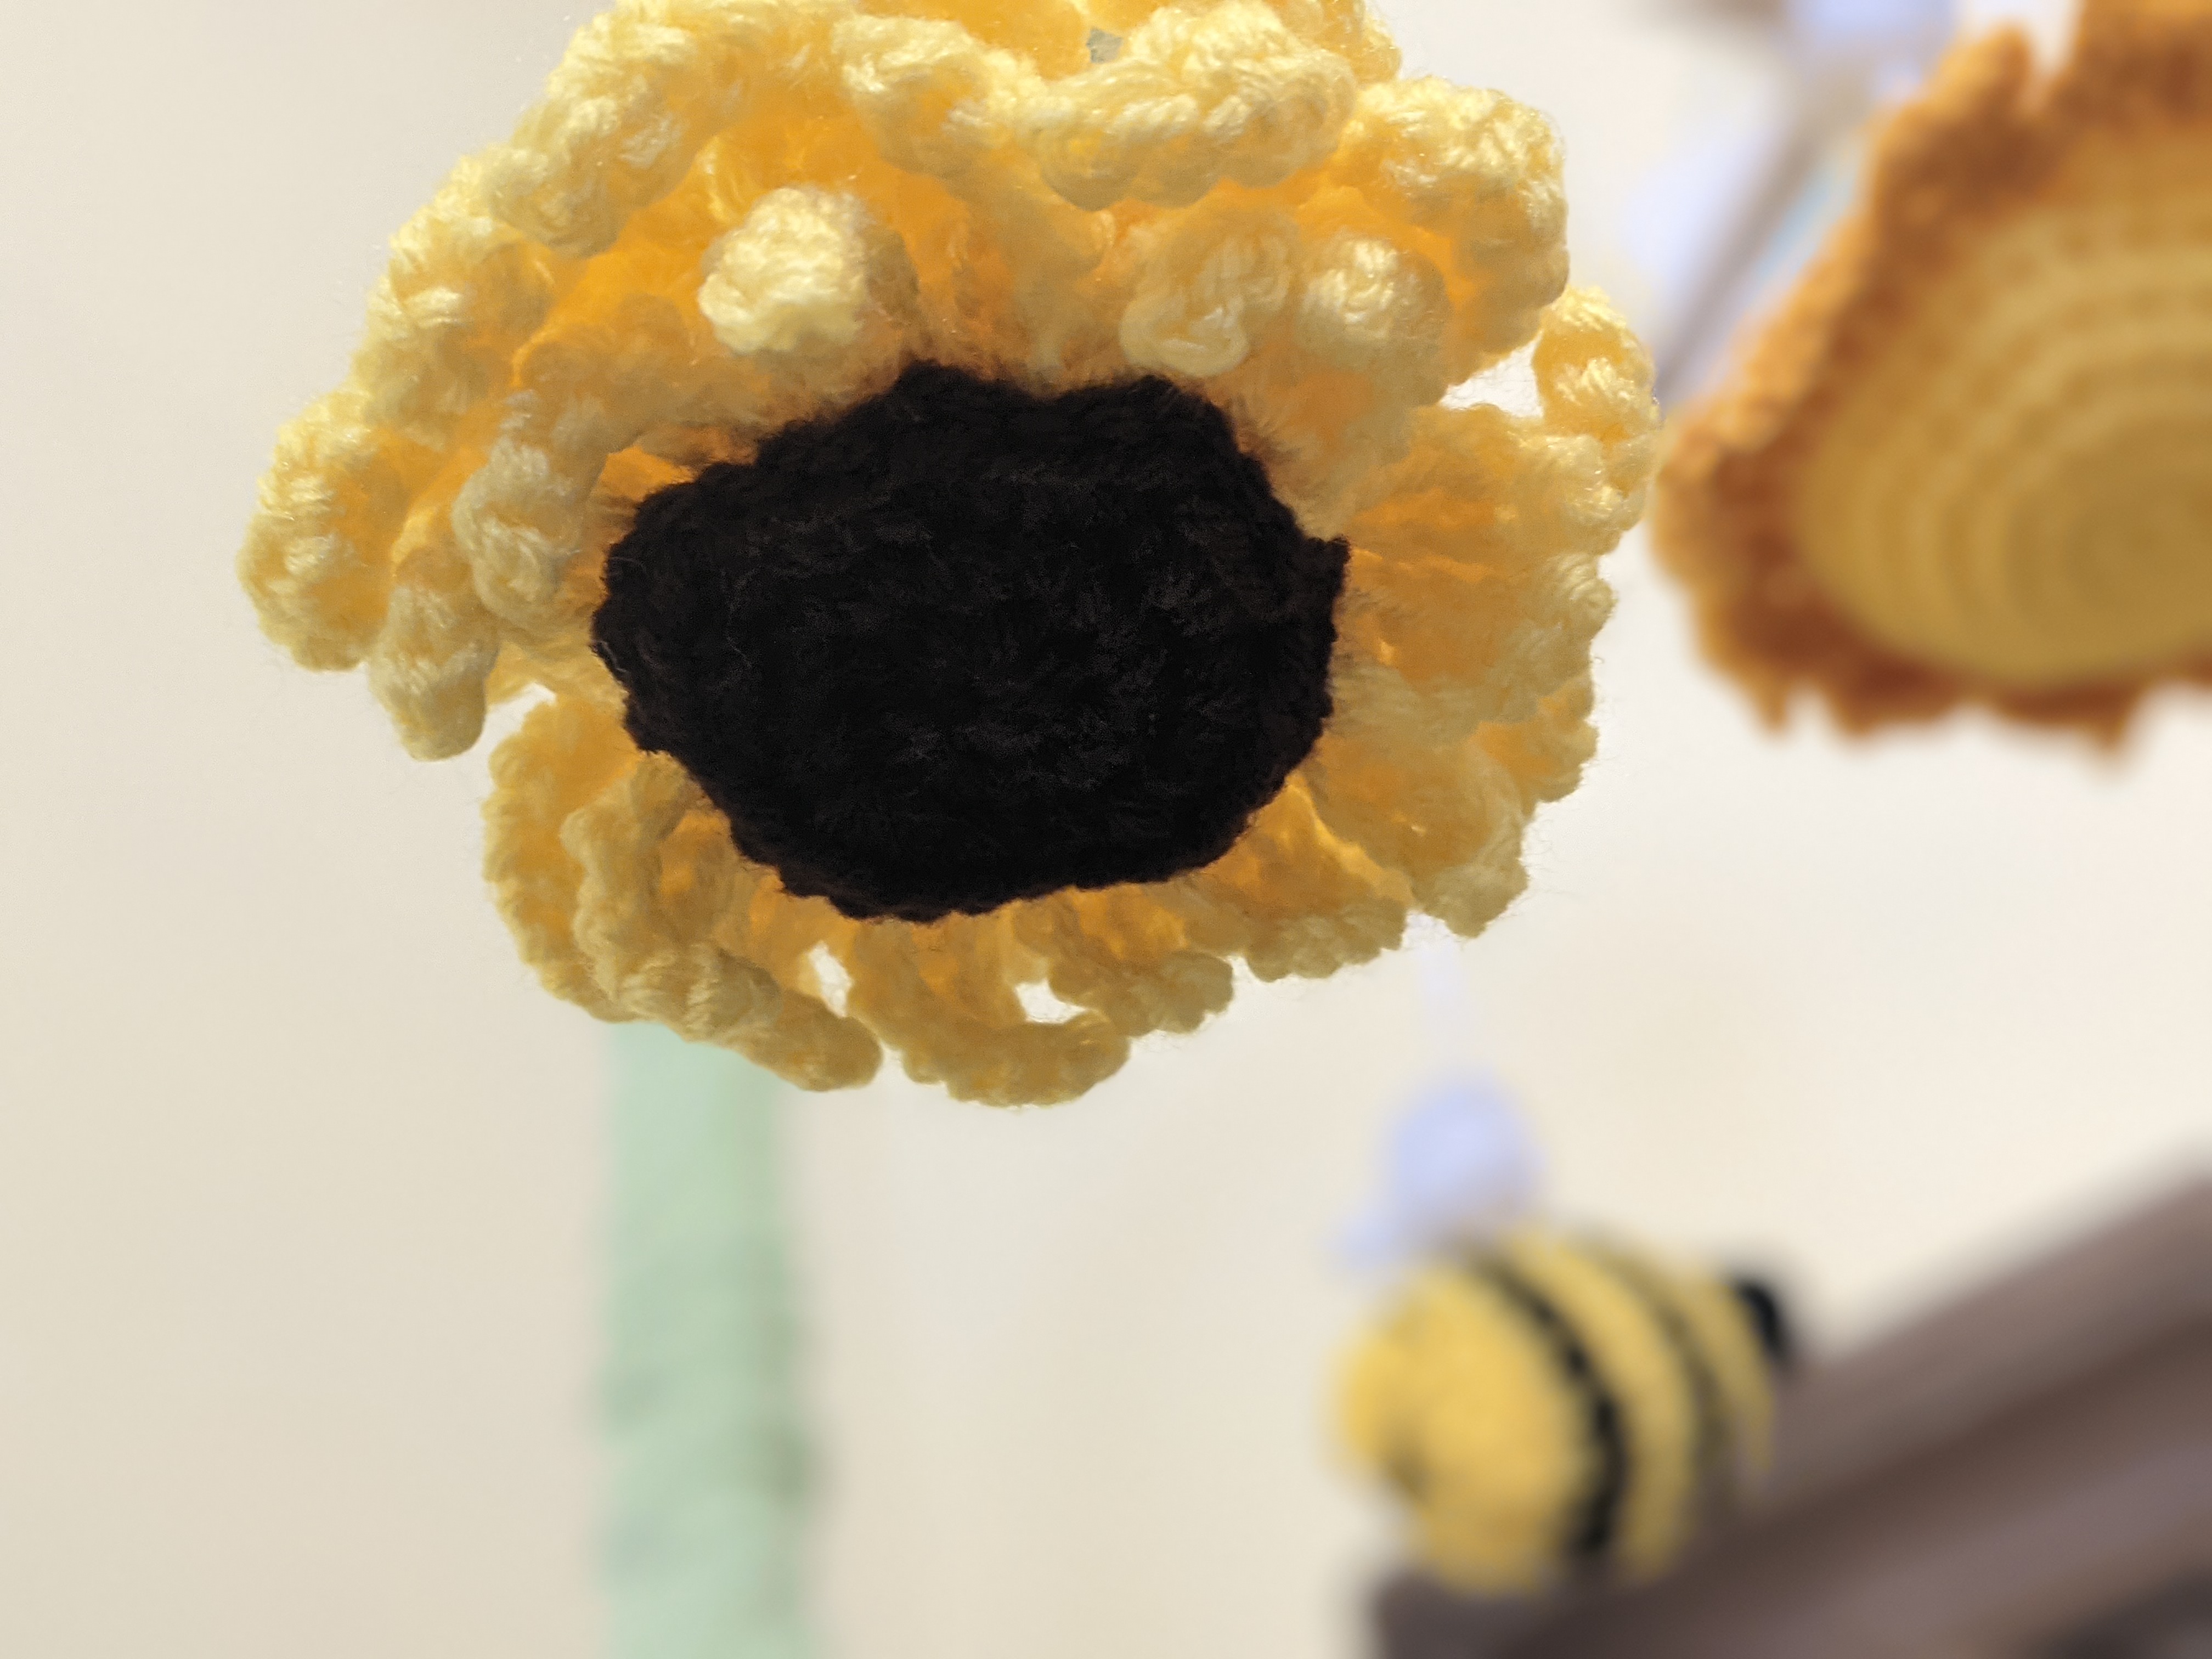
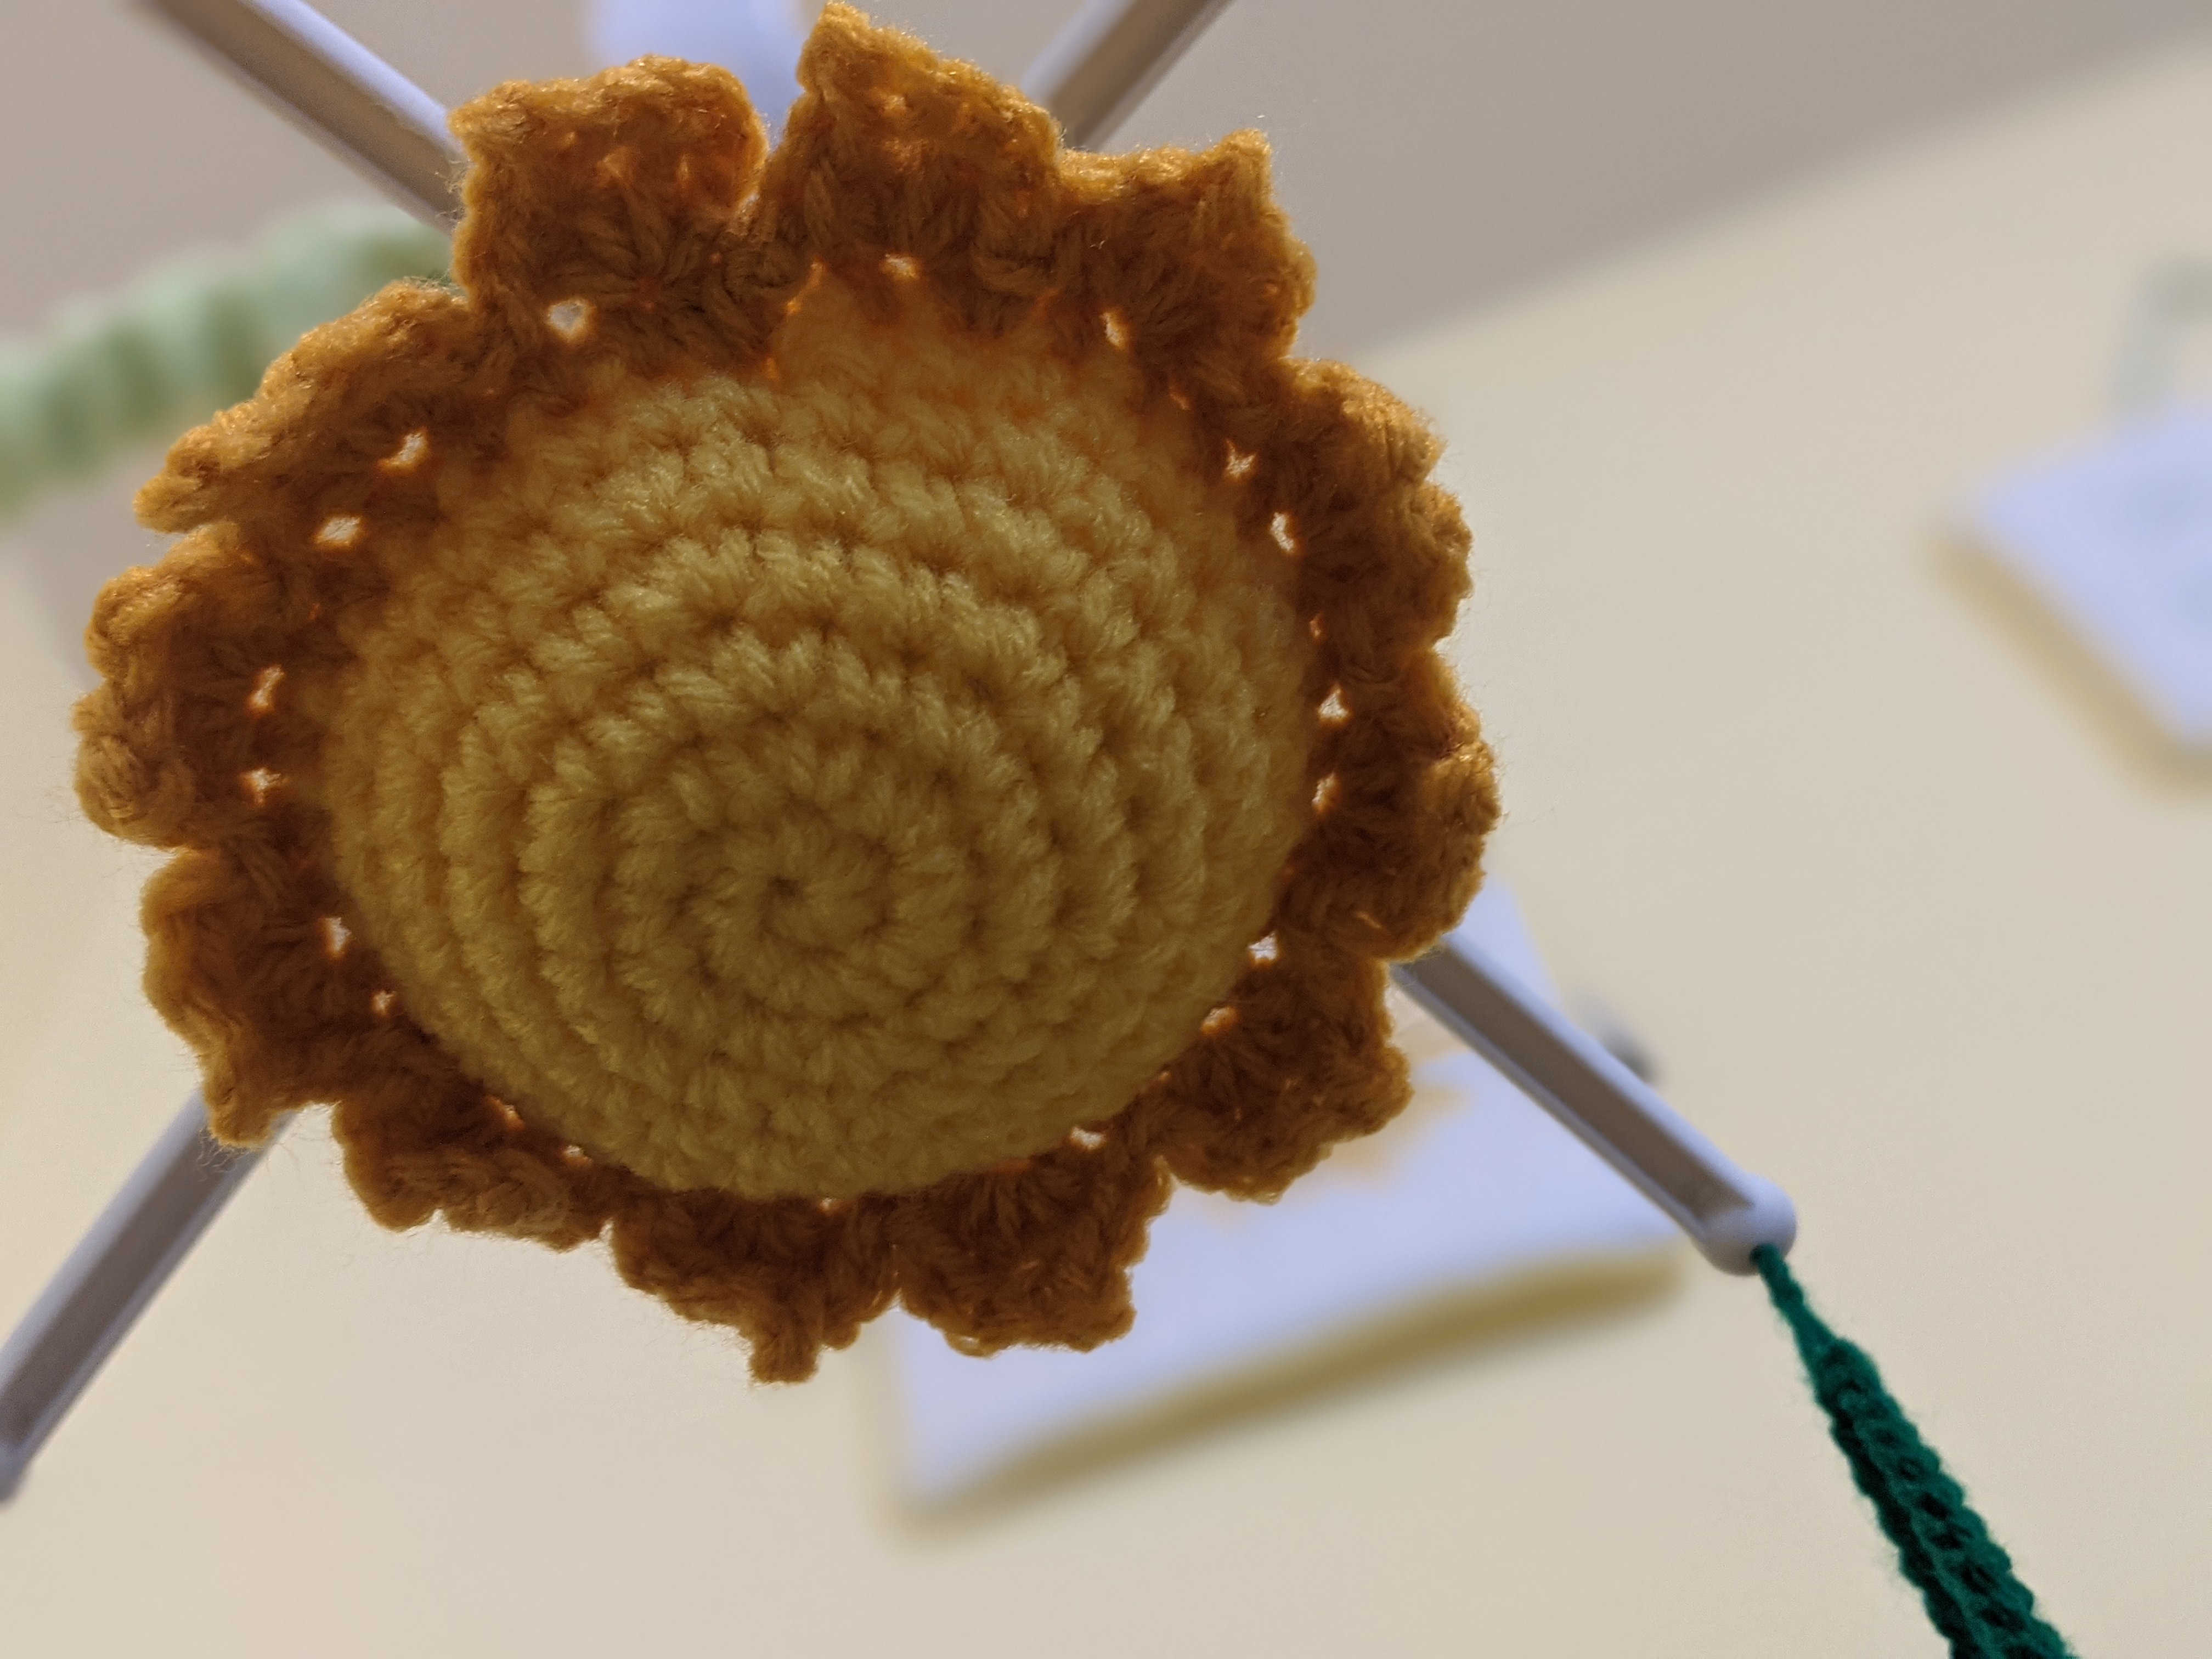
Sunflower (make two))
Start with yellow yarn and 4.5mm crochet hook
8sc in a magic circle
Round 1: 2sc in each st around (16)
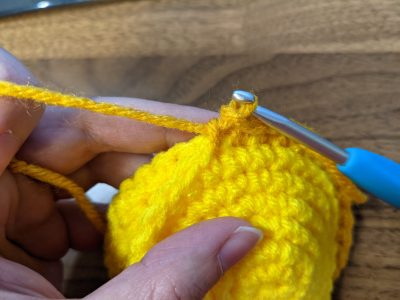
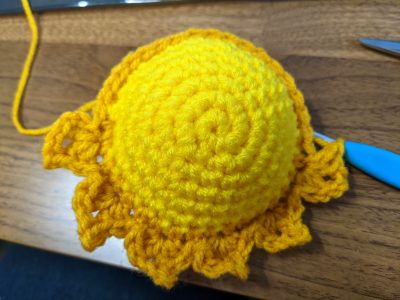
Now you will work around and create the petals. Place stitches into the BLO (back loop only) while working up each petal. Starting where you left off you will *ch 9 and work your way down the chain with: sl st, sc, hdc, dc, dc, dc, hdc, sc and sl st into the BLO of the next stitch*. Repeat around for a total of 16 petals. This will create your first round of sunflower petals.
Next you will create the second layer of petals by inserting your hook into the FLO (front loop only) in front of each completed petal. *Ch 7 and work your way down the chain with: sl st, sc, hdc, dc, hdc, sc and sl st into the FLO of the next stitch*. Repeat around for a total of 16 interior petals.
Now you will fasten off and weave in all of your ends. Place the completed flower to the side.
Now working with dark green yarn and the same hook you will create a back piece for your flower.
8sc in a magic circle
Round 1: 2sc in each st around (16)
Do not fasten off.
This next portion is optional, depending on how your mobile arms attach pieces. If it’s a hook style that grips the piece, this method will work well for you, if not you will want to fasten off and attach to the mobile by way of tying with a separate piece of yarn.
From this point you will ch 30. Attach ch to opposite side of where ch started. This will form a loop you can later attach to your mobile arm. Now leave a long tail for sewing and sew the green piece to the back of your flower piece.
Now working with dark brown yarn and the same hook you will create the front piece for your flower.
8sc in a magic circle.
Round 1: 2sc in each st around (16)
Round 2: 2sc in each st around (32)
Now you will sew in the loose ends and leave a long tail for sewing. Sew the brown front piece to the front of your flower. When attaching, be sure to sew the piece between the front flower petals so that the brown sewn parts do not show on the back. This will keep the flower tidy looking. Once you have done so, fasten up and sew in any remaining ends!
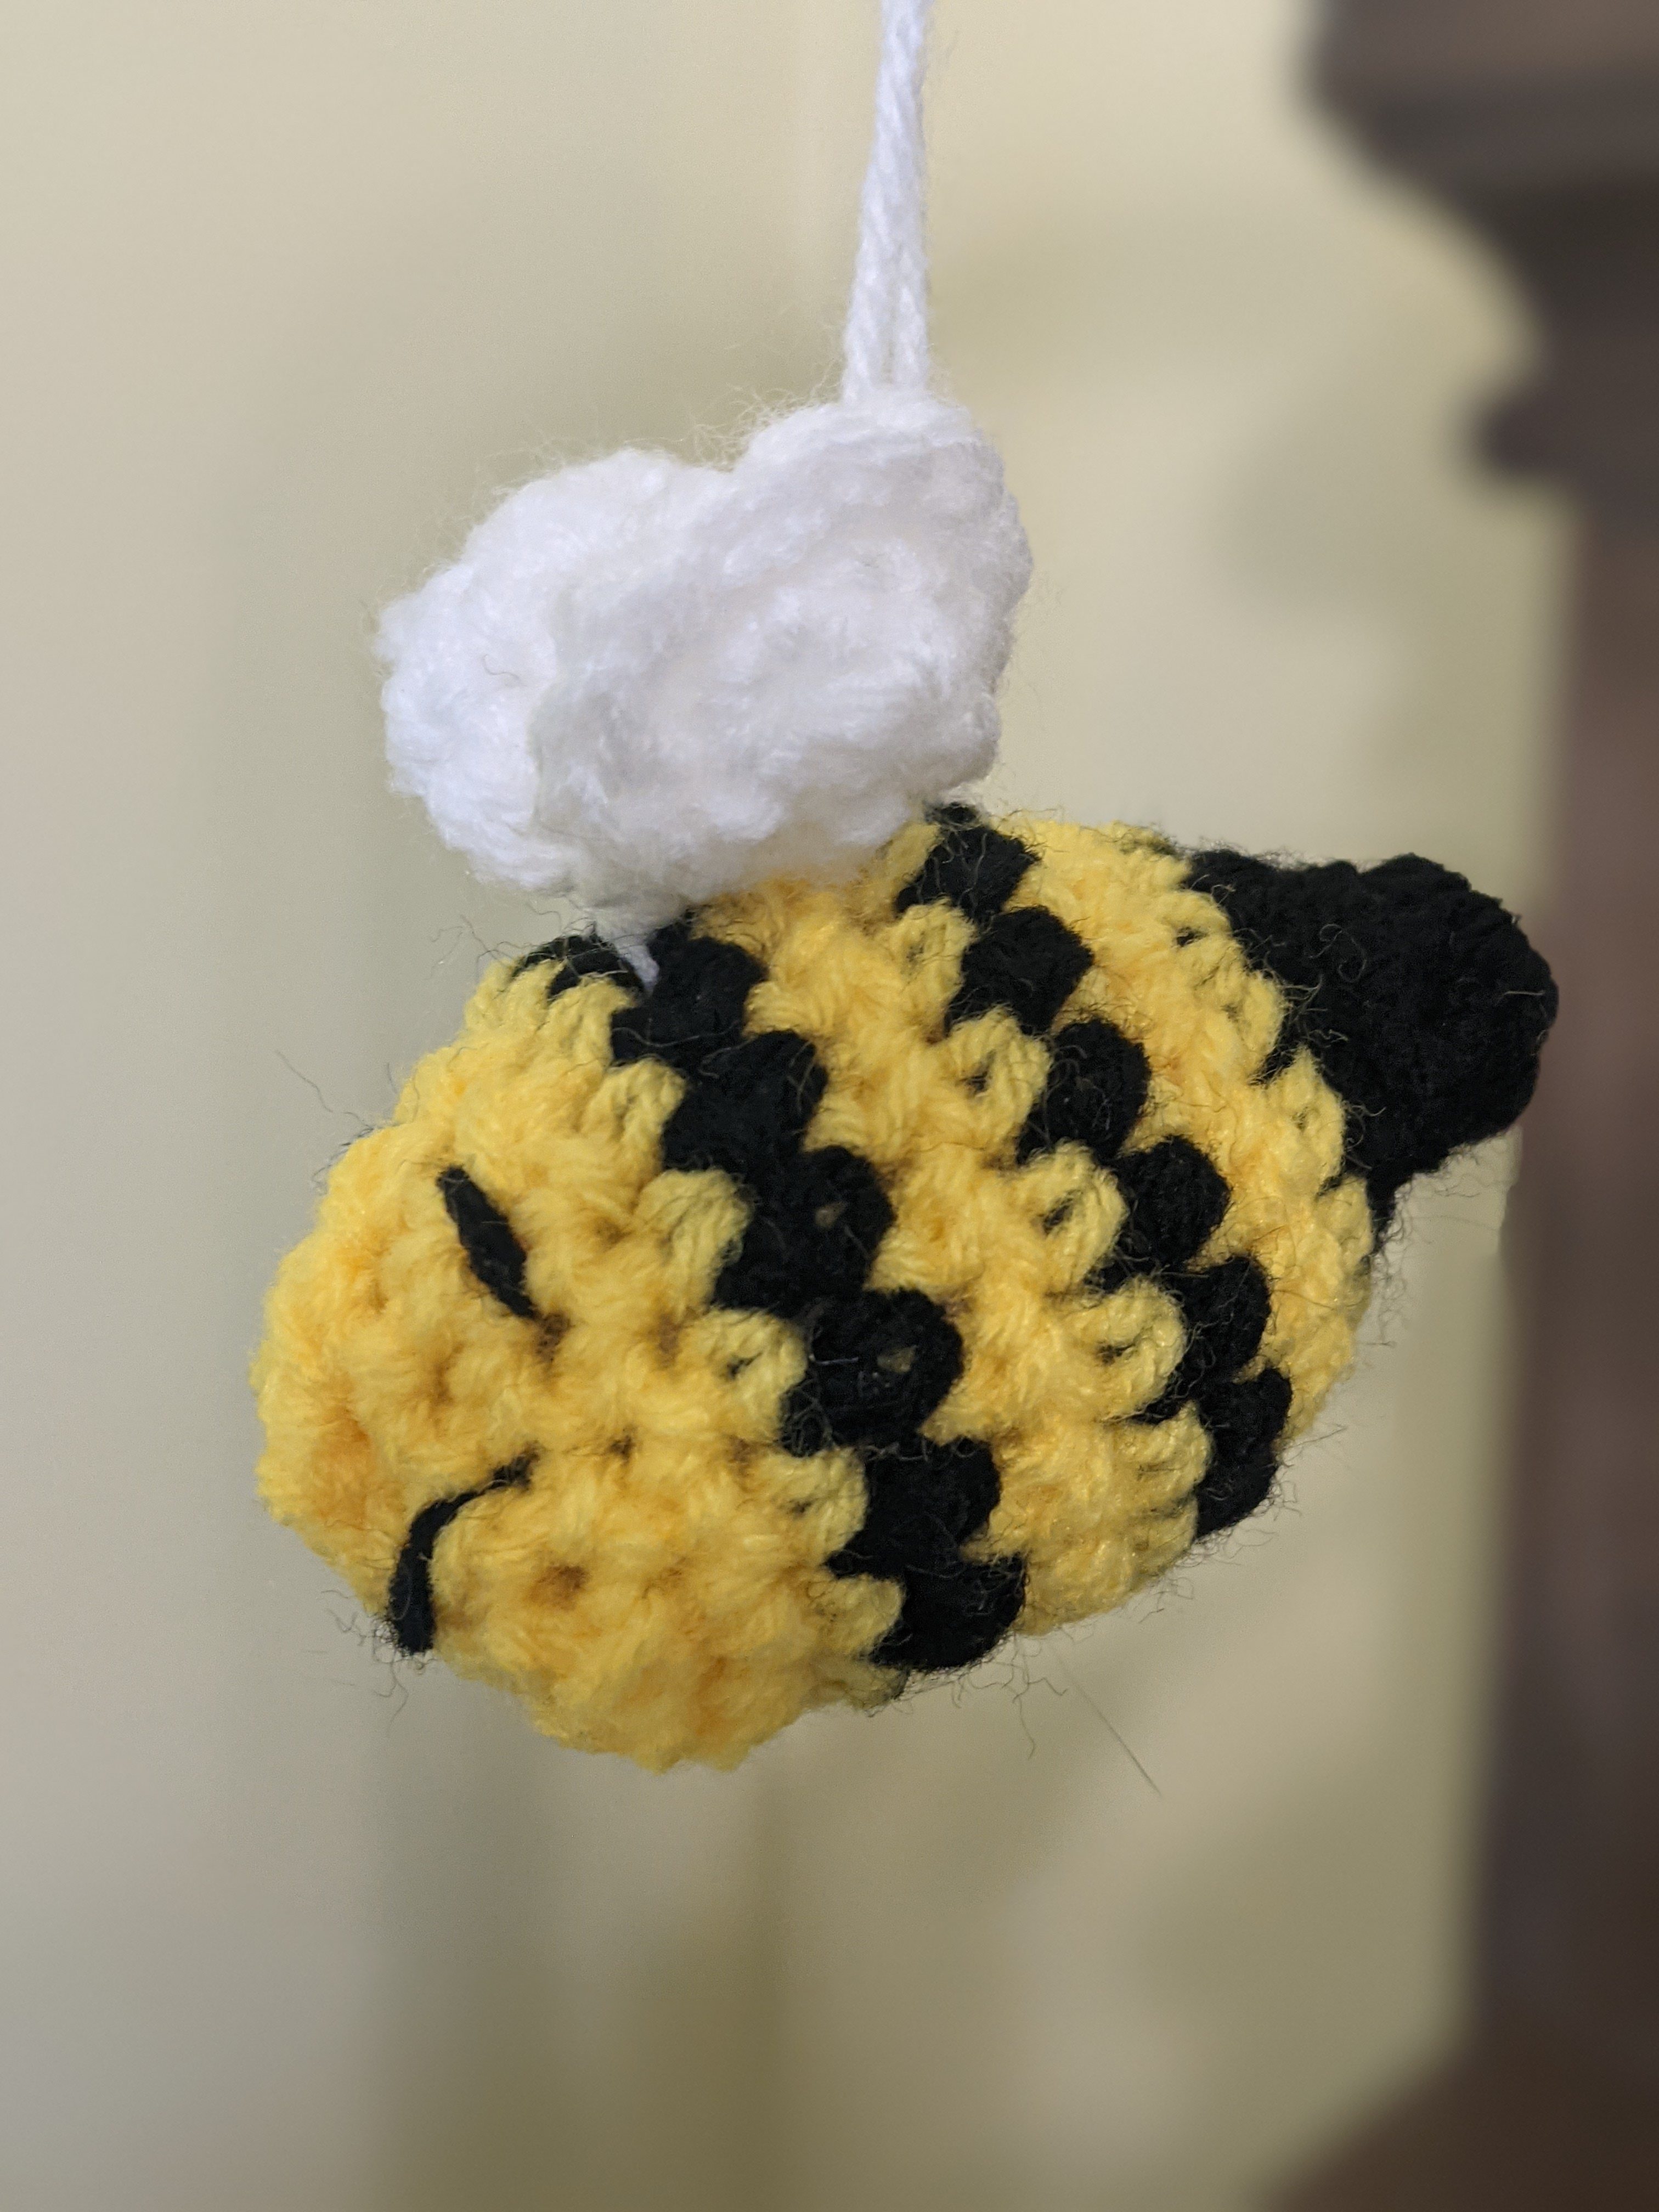
Bee (Make two)
Start with black yarn and 3.5mm crochet hook
3sc in a magic circle
Round 1: sc in each st around (3)
Round 2: 2sc in each st around (6)
Round 3: *sc in 1st st, 2sc in the next st;* repeat around (9)
Round 4: *sc in 1st 2 sts, 2sc in the next st;* repeat around (12)
Change to yellow
Round 5: *sc in 1st 3 sts, 2sc in the next st;* repeat around (15)
Round 6: *sc in 1st 4 sts, 2sc in the next st;* repeat around (18)
Change to black
Round 7: sc in each st around (18)
Change to yellow
Rounds 8 and 9: sc in each st around (18)
Change to black
Round 10: sc in each st around (18)
Change to yellow
Round 11: sc in each st around (18)
Round 12: *sc in 1st 4 sts, dec next 2 sts together;* repeat around (15)
Round 13: *sc in 1st 3 sts, dec next 2 sts together;* repeat around (12)
Round 14: *sc in 1st 2 sts, dec next 2 sts together;* repeat around (9)
Stuff with polyfil stuffing
Round 15: *sc in 1st st, dec next 2 sts together;* repeat around (6)
Round 16: dec around until piece closes. Fasten off and weave in all ends.
At this point feel free to embroider on eyes and a mouth to your bee.
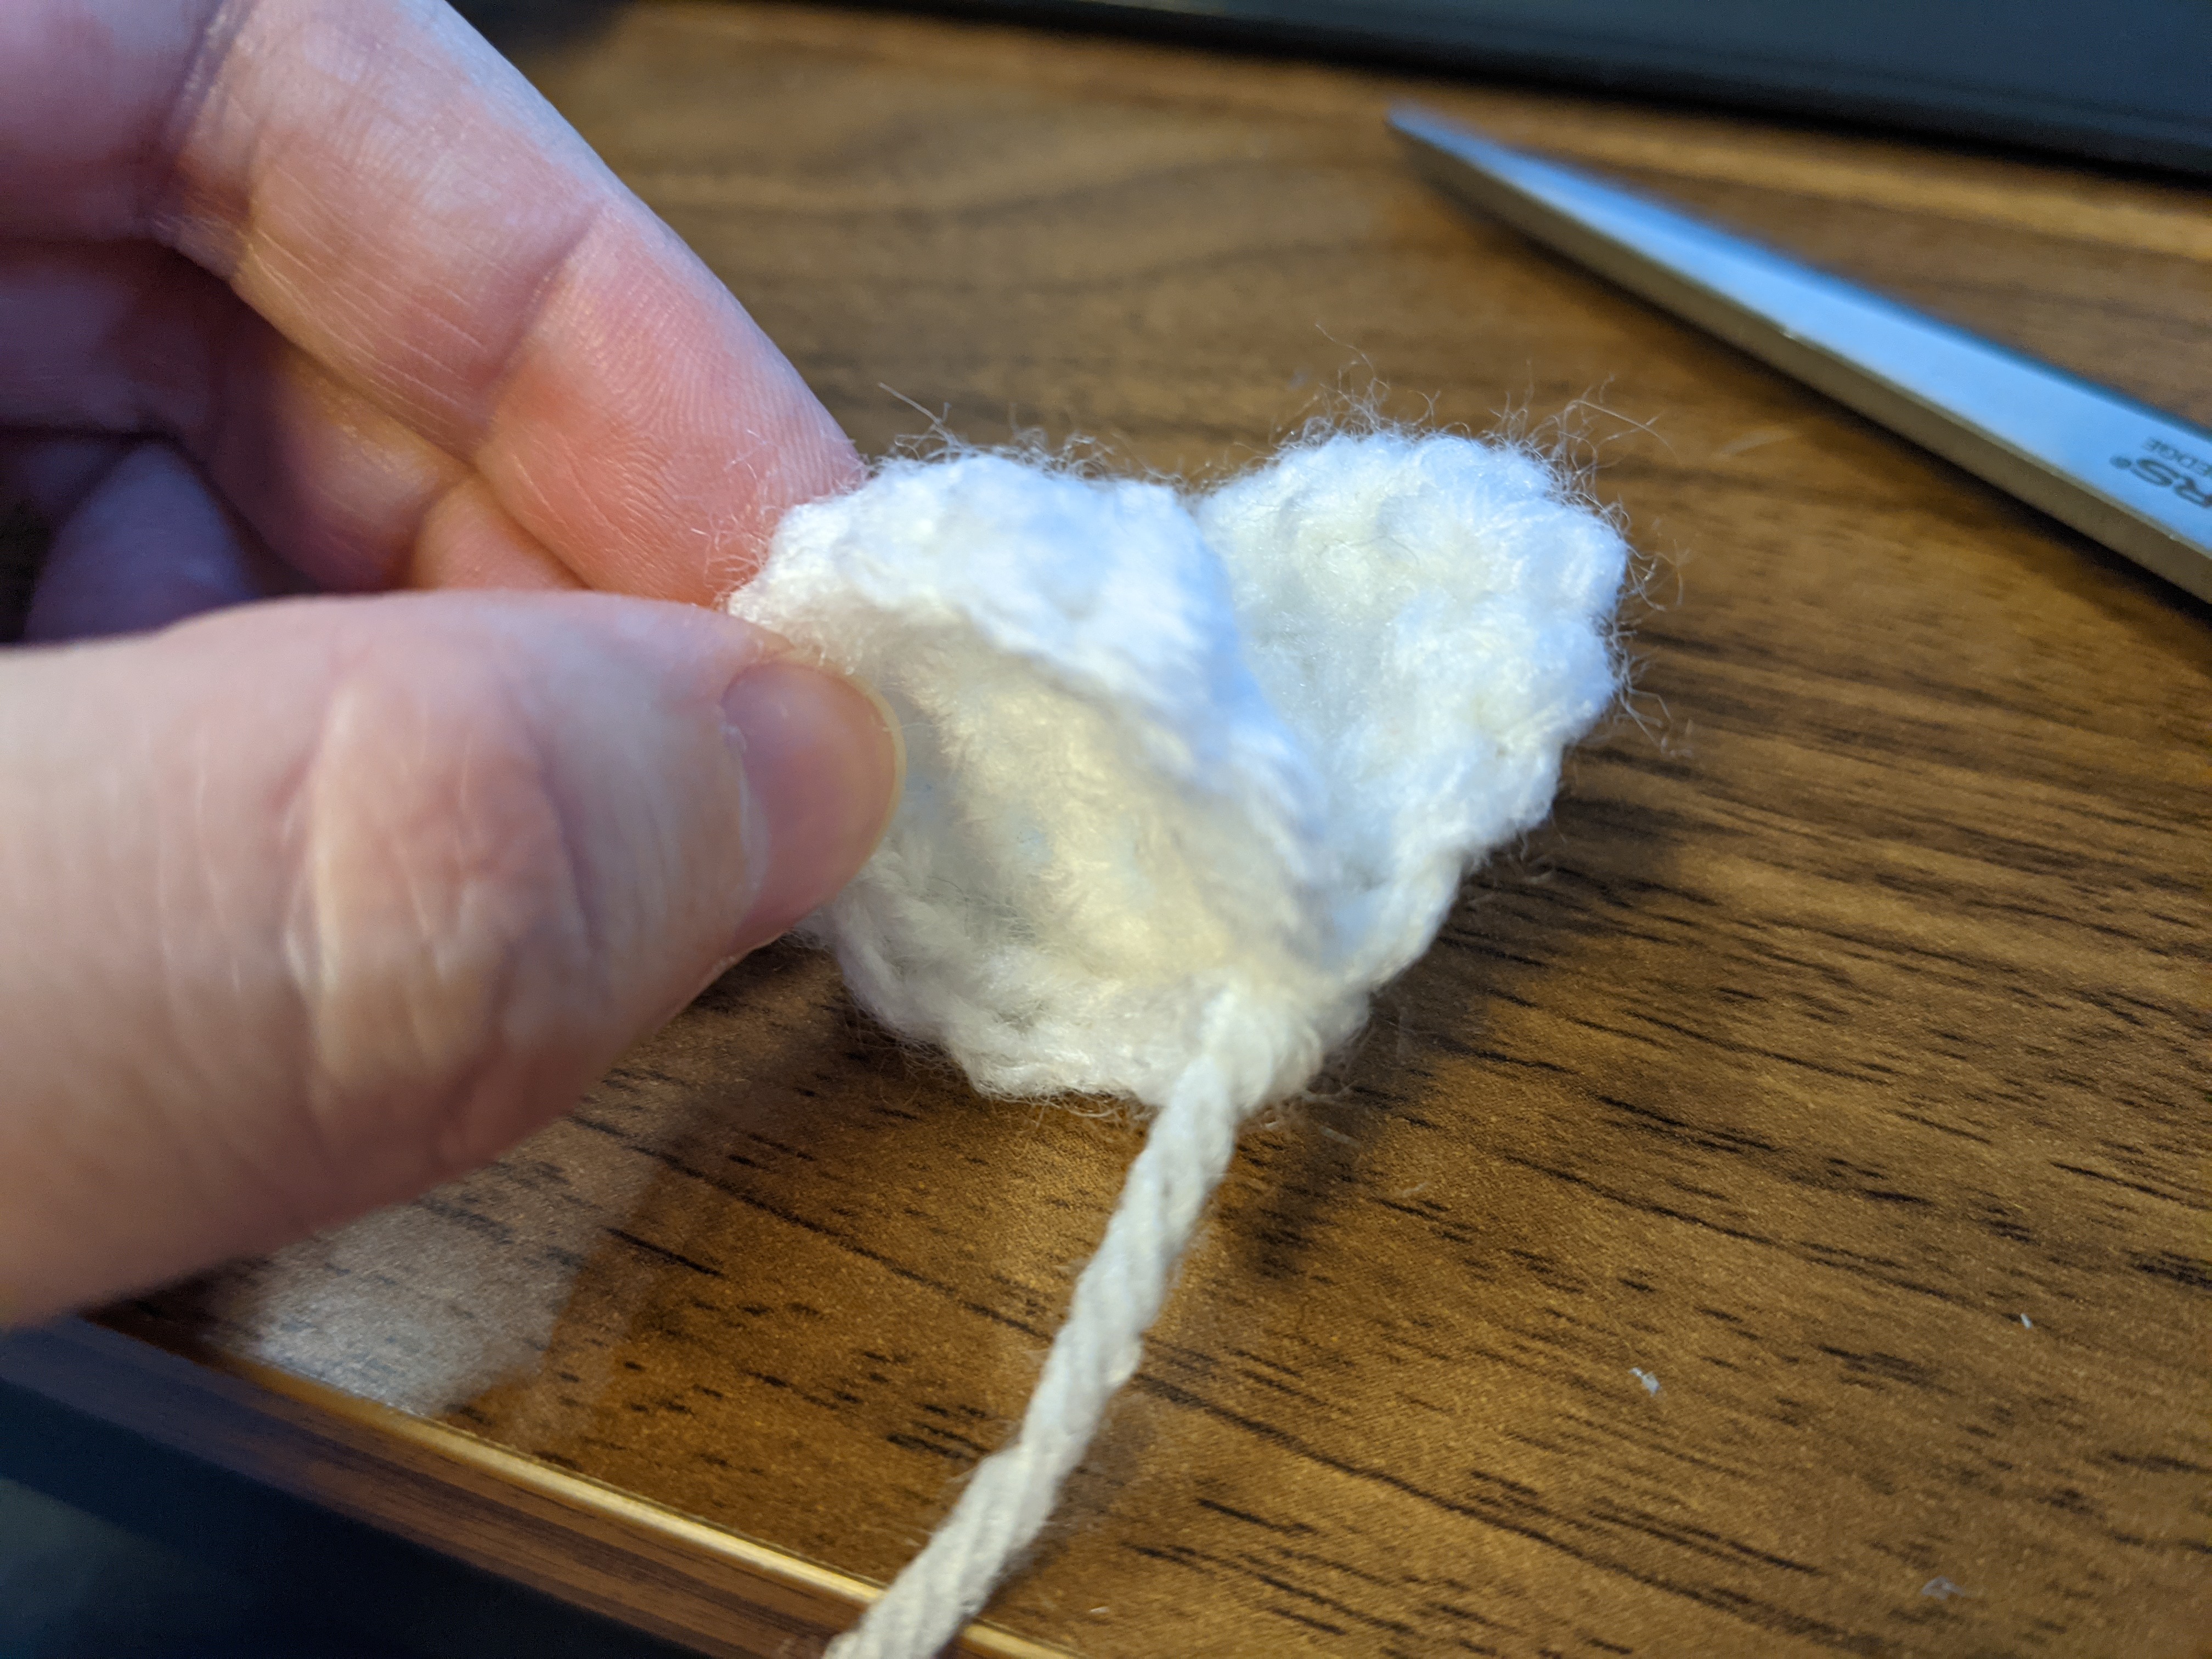
Wings (make two)
Use white yarn and 3.5mm crochet hook
4sc in a magic circle
Round 1: 2sc in each st around (8)
Round 2: *sc in 1st st, 2sc in the next st;* repeat around (12)
For the 1st wing you will fasten off and weave in ends. For the final wing do not fasten off.
Bring both wings together and attach at the bottom with sc for a total of 3 sc. Leave a long tail for sewing and sew directly onto your bee’s back.
You will now attach an additional piece of white yarn to the piece for attaching to your mobile.
Sun (make two of these pieces)
Start with yellow yarn and 3.5mm crochet hook
6 sc in a magic circle
Round 1: 2sc in each st around (12)
Round 2: *sc in 1st st, 2sc in the next st;* repeat around (18)
Round 3: *sc in 1st 2 sts, 2sc in the next st;* repeat around (24)
Round 4: *sc in 1st 3 sts, 2sc in the next st;* repeat around (30)
Round 5: *sc in 1st 4 sts, 2sc in the next st;* repeat around (36)
Round 6: sc in each st around (36)
Fasten off both sun pieces and weave in all of the ends.
Sun Border
Switch to gold yarn and 4.5mm crochet hook
At this point you will bring the two sun pieces together and attach your gold yarn. Sc around to bring the two pieces together for a total of 36 sc. Before completely closing the piece with the sc stitches, leave a small opening to lightly fill with polyfil stuffing. Once you have finished your border/seal, you will then begin the rays.
In the 1st sc space you will begin with a ch 3. In the same space you will place a dc and then ch 3. In the 2nd ch from hook sl st (this creates the tip of the ray). Finish with two additional dc into the original sc space. Sl st in the next 2 sts and you will continue to make another ray (dc, dc, ch 3 with a sl st in 2nd ch from hook, dc, dc) and sl st into the next two sc stitch spaces. Repeat around for a total of 12 sun rays.
To finish the sun piece, attach a piece of yarn in the middle for hanging.
Now just attach your pieces to your mobile! If you bought the same one as me, you’ll want to attach by one yarn piece. You can push the yarn through the holes on the mobile arms and tie or you may choose to push the yarn directly through the arm holes and tie a larger knot to secure it at the top so it’s not showing. Just be sure to test how snug and secure each piece is on the arm!
Once all of it is put together, just add it to the crib! You may choose to decorate your mobile with a cover or keep it as is. Either way, it’s sure to be one of the cutest parts of your nursery, outside of your newborn, of course! Enjoy and happy crocheting!
All designs & pictures are copyrighted by To Craft A Home 2021. Pattern is for personal use only and can’t be resold, republished, or redistributed in any way. You may sell the finished project if you so desire, but please give credit and link to my website www.tocraftahome.com or my etsy www.tocraftahome.etsy.com
Find more of my patterns on Ravelry: https://www.ravelry.com/people/ToCraftAHome