
![]()
Hello readers! It’s been quite some time. With last year’s busy holiday season and all the crazy life happenings of my household (yes, even during a pandemic things get busy here!), I’ve hardly had a second to sit down and work up patterns and focus on this blog. I do have some fun patterns coming up though and all of them have a theme. They’ll be baby patterns! Why you might ask? It’s a very exciting time in my family and we’ll be introducing our third child later this year! Yep! I’m pregnant! And so what does a pregnant crocheter do? Come up with patterns for their new addition of course! Over the next few blog entries I’ll be sharing what I come up with.
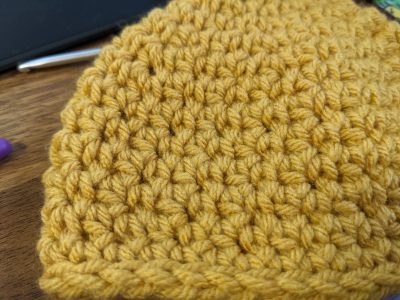
The first thing I worked up was this universal knotted baby hat. I’ve seen a few versions here and there, but this one I’ve come up with uses an assortment of stitches to give it a truly unique look and great texture. What I love about this hat style is that it is truly gender neutral and if you’re like me, the minute you find out you’re pregnant, you just want to create, create, create! By the time the gender reveal comes around, I’ve already had several projects made up and waiting for baby so the more things I can make in a gender neutral way, the better! But really, any color looks wonderful! I have included sizes from newborn to 12 months in here so you can make any amount in any color you choose!
![]()
This hat can be worked up in sizes 0-3 month, 3-6 month, as well as 6-12 month. It will work up quickly and makes the best gift for any baby shower or for your own bundle of joy.
Materials:
-Worsted Weight yarn in any color (I used Crafter’s Secret brand, but any worsted weight yarn will do)
-5.5mm crochet hook
-Embroidery needle
***Before starting this pattern the best tip I can give is that these hats are worked up with alternating stitches after the first 12 rows. I have written everything out for you to follow, but as long as you continue to alternate (sc, hdc) back and forth, your hat will come out just fine! It can be a little tricky with increases though, so be patient and be sure to keep track carefully! The end result is a wonderfully textured, warm little beanie and is quite worth all the alternating stitches!
0-3 Months
6sc in a magic circle.
Rows 1-12: sc in each st around (6)
This will create the part of the hat you can later tie. Now you will alternate stitches by working your piece with sc then hdc following it in the next rounds.
Row 13: 2sc in each st around (12)
Row 14: *sc in 1st st, hdc and sc into next st, hdc in next st, sc and hdc into next st* repeat those alternating sts until you reach the end of your round (18)
Row 15: *sc in 1st, hdc in next st, hdc and sc into the next st; hdc in next st, sc in next st, hdc and sc in next st* repeat those alternating sts until you reach the end of your round(24)
Row 16: *sc in 1st st, hdc in next st, sc in next st, hdc and sc into next st; hdc in next st, sc in next st, hdc in next st, sc and hdc into next st* repeat those alternating sts until you reach the end of your round (30)
Row 17: sc in 1st st, hdc in next st, sc in next st, hdc in next st, sc and hdc into next st; sc in next st, hdc in next st, sc in next st, hdc in next st, and sc and hdc into next st* repeat those alternating sts until you reach the end of our round(36)
Row 18: sc in 1st st, hdc in next st, sc in next st, hdc in next st* repeat this pattern until you get to 13 sts then place a sc and hdc into the next st* repeat those alternating sts until you reach the end of your round (40)
Rows 19-23: *sc in 1st st, hdc in next st* repeat these alternating sts until you reach the end of the round (40)
Round 24: sc all the way around (40)
Round 25: sl st in each st around to create the final border (40)
3-6 Months
6sc in a magic circle
Rows 1-12: sc in each st around (6)
This will create the part of the hat you can later tie. Now you will alternate stitches by working your piece with sc then hdc following it in the next rounds.
Row 13: 2sc in each st around (12)
Row 14: *sc in 1st st, hdc and sc into next st, hdc in next st, sc and hdc into next st* repeat those alternating sts until you reach the end of your round (18)
Row 15: *sc in 1st, hdc in next st, hdc and sc into the next st; hdc in next st, sc in next st, hdc and sc in next st* repeat those alternating sts until you reach the end of your round(24)
Row 16: *sc in 1st st, hdc in next st, sc in next st, hdc and sc into next st; hdc in next st, sc in next st, hdc in next st, sc and hdc into next st* repeat those alternating sts until you reach the end of your round (30)
Row 17: sc in 1st st, hdc in next st, sc in next st, hdc in next st, sc and hdc into next st; sc in next st, hdc in next st, sc in next st, hdc in next st, and sc and hdc into next st* repeat those alternating sts until you reach the end of our round(36)
Row 18: sc in 1st st, hdc in next st, sc in next st, hdc in next st* repeat this pattern until you get to 13 sts then place a sc and hdc into the next st* repeat those alternating sts until you reach the end of your round (40)
Round 19: sc all the way around (45)
Round 20: sl st in each st around to create the final border (45)
6-12 Months
6sc in a magic circle
Rows 1-12: sc in each st around (12)
This will create the part of the hat you can later tie. Now you will alternate stitches by working your piece with sc then hdc following it in the next rounds.
Round 13: 2sc in each st around (12)
Row 14: *sc in 1st st, hdc and sc into next st, hdc in next st, sc and hdc into next st* repeat those alternating sts until you reach the end of your round (18)
Row 15: *sc in 1st, hdc in next st, hdc and sc into the next st; hdc in next st, sc in next st, hdc and sc in next st* repeat those alternating sts until you reach the end of your round(24)
Row 16: *sc in 1st st, hdc in next st, sc in next st, hdc and sc into next st; hdc in next st, sc in next st, hdc in next st, sc and hdc into next st* repeat those alternating sts until you reach the end of your round (30)
Row 17: sc in 1st st, hdc in next st, sc in next st, hdc in next st, sc and hdc into next st; sc in next st, hdc in next st, sc in next st, hdc in next st, and sc and hdc into next st* repeat those alternating sts until you reach the end of our round(36)
Row 17: sc in 1st st, hdc in next st, sc in next st, hdc in next st, sc in next st, hdc and sc in next st; hdc in next st, sc in next st, hdc in next st, sc in next st, hdc in next st, and sc and hdc into next st* repeat those alternating sts until you reach the end of your round (42)
Row 18: *sc in 1st st, hdc in next st, sc in next st, hdc in next st, sc in next st, hdc in next st, sc and hdc into the next st;* repeat those alternating sts until you reach the end of your round (48)
Row 19: sc in 1st st, hdc in next st, sc in next st, hdc in next st* repeat this pattern until you get to 11 sts then place a sc and hdc into the next st* repeat those alternating sts until you reach the end of your round(52)
Rows 20-26: *sc in 1st st, hdc in next st;* repeat alternating sts until you reach the end of your round (52)
Row 27: sc all the way around (52)
Row 28: sl st in each st around to create the final border (52)
![]()
![]()
Now after you’ve finished the basic beanie portion of the hat, it’s time to return to the top portion and tie it in a knot for the finishing look. I personally preferred the look of a double knot, but a single knot would work just fine too. You simply take the long top portion and create a basic square knot. After that, you’re all done! Enjoy and happy crocheting!
All designs & pictures are copyrighted by To Craft A Home 2021. Pattern is for personal use only and can’t be resold, republished, or redistributed in any way. You may sell the finished project if you so desire, but please give credit and link to my website or my Etsy
Find more of my patterns on Ravelry